Wednesday, October 17, 2012

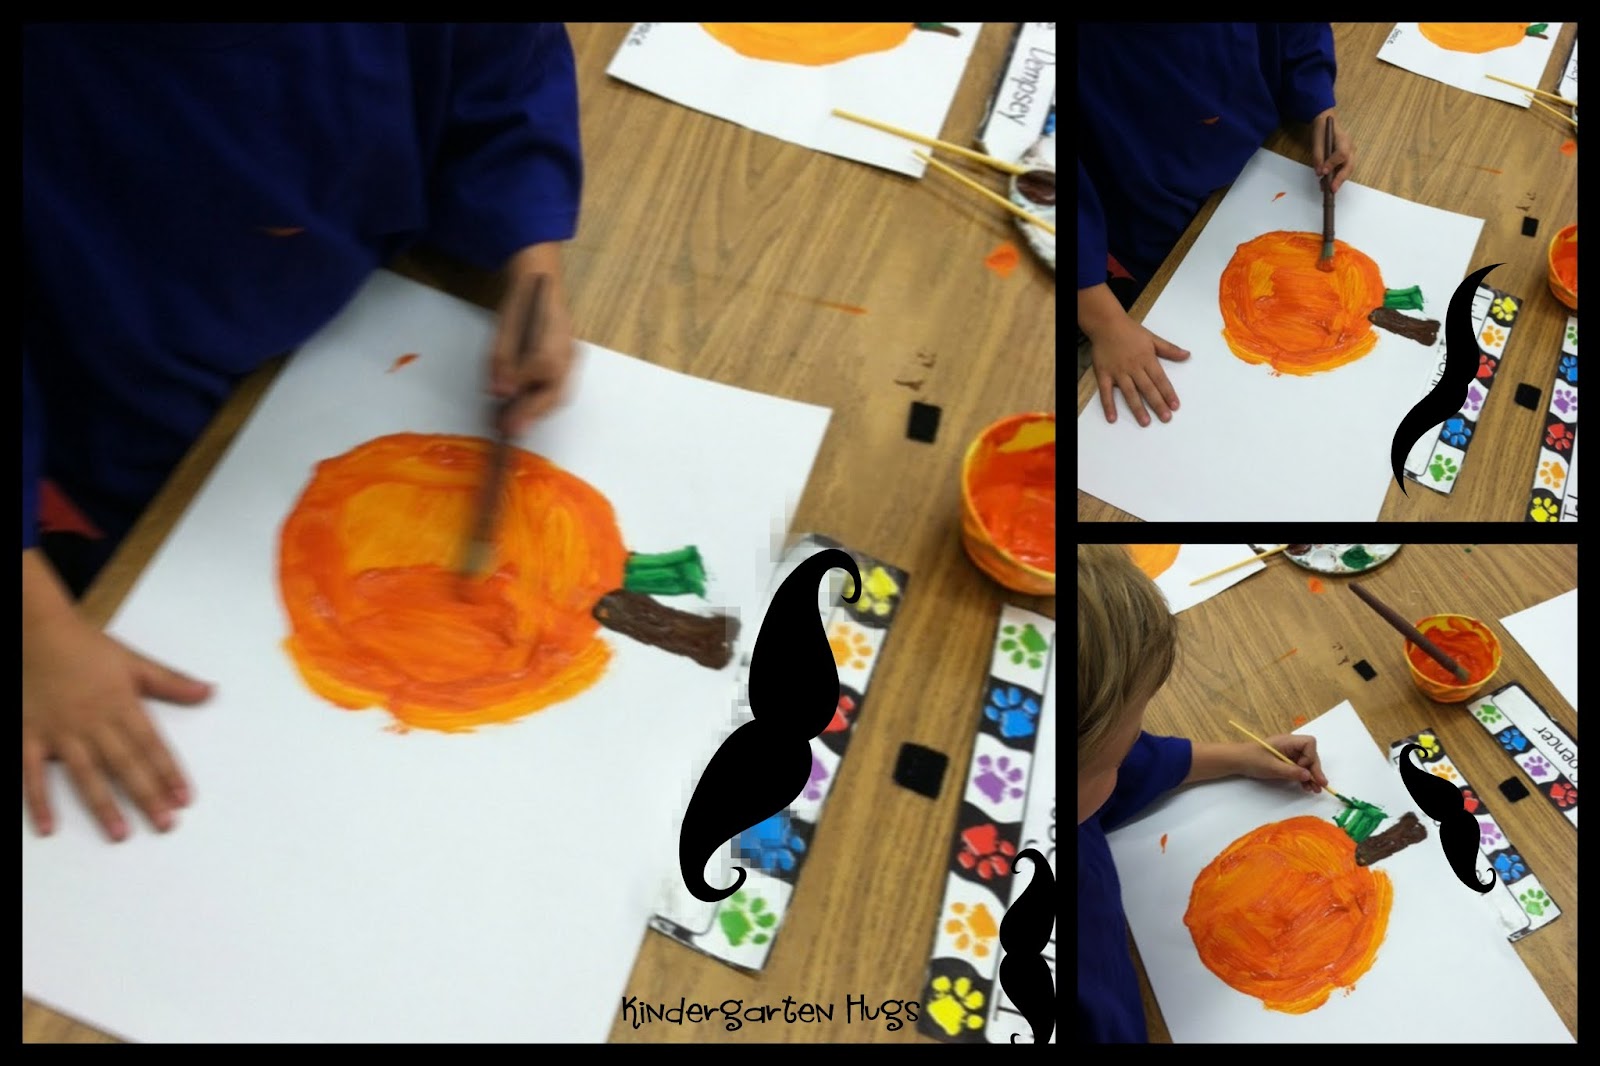
Pumpkin Painting!


Hello, my name is Carie and I am a kindergarten teacher in Illinois! 

A few years ago, our school district decided to cut our elementary art position. Our Art teacher was AMAZING! She got our kindergarten and first graders to create masterpieces that I couldn’t even create on my own! So we were very sad to see her leave and take all of her Art Magic with her! So, for the past few years I have been trying to make Art as meaningful to my students as she did hers. After years of giving students construction paper and letting them cut and paste the pieces to make jack-o-lanterns; like this...


 The construction paper jack-o-lanterns are fun too...


but...........


This year I decided to get over my fear of letting all of my students paint at the same time and let paint do the talking! 

Painting is very therapeutic and my kiddos needed some of this therapeutic time (as did I). As I was filling paint trays, I ran out of orange paint so I used it as a teaching moment to teach students which two colors make orange and then showed them how to mix red and yellow...then WAHHH LAHHH, we had orange! We then talked about how to use each paint brush in only one color so not to mix the colors to make even more colors. We didn't want crazy color pumpkins for this activity...just orange :)


I let the students choose what size of paper they wanted (12X18 or 9X12). They then got to choose if they wanted a short, fat pumpkin or a tall, skinny pumpkin. (They all reminded me that those different kinds of pumpkins were opposites). Each student also got to choose if they just wanted to paint a pumpkin or if they wanted to paint a jack-o-lantern.  Then I let the painting begin. 


They had enjoyed it so much, they wanted to paint more pumpkins and jack-o-lanterns. If we would have had had more time, I definitely would have let them! They were so calm and serious while painting…they need this ART time to express themselves and let their true personalities show in through in their “masterpieces” 


I hope everyone has a very Happy Halloween!! 


Tuesday, October 16, 2012

Making BOO! Fun


Making BOO! Fun
     Miss Carole here – with another fun song from Macaroni Soup!   
This is the season of Boo! and Aaaahhhh! and Gotcha! But it’s not nice to scare little children, right?  RIGHT!  
     So let’s have fun songs that deal with the elements of October’s tricking and treating holiday, without the fearfulness that some children experience with ghosts lurking around every corner and skeletons dangling in doorways.
    Let’s start with bats.  Last month I shared a great bat song,  “Bats are Sleeping”, which will be on my new cd when it’s released in about a month.  But remember – you don’t need the cd to do it – you probably know “Frere Jaques”, the tune, so you can just sing it. 
    Let’s supersize it – add another batty song, a book, and a craft idea.

THE SONG:  “BLACK BAT FARM”  (by me, c. 2002)
Tune:  “The Green Grass Grew All Around” – but in a minor key!
Supplies:  You can either draw the parts to the song on paper, or do it on a flannelboard.  Be sure to cut enough felt bats for everyone to put one on the board. 
You can hear the song at my website: http://www.macaronisoup.com/Songs/October2004.htm

Lyrics:
There was a farm       (kids echo)
A spooky little farm    (echo)
The spookiest farm    (echo)
That you ever did see (echo)
A field's on the farm, the farm's full of spooks...BOO! 

(refrain:)
And the black bats flew all around, all around
The black bats flew all around, oooohhhh!
The black bats flew all around, all around
The black bats flew all around. 
And in that field (echo) There is a vine (echo)
The creepiest vine (echo) That you ever did see (echo)
The VINE...Field...Farm...Spooks...BOO! 
(refrain) 

And on that vine (echo) There is a pumpkin (echo)
The cutest little pumpkin (echo) That you ever did see (echo)
The pumpkin's on the VINE...Field...Farm...Spooks...BOO! 

(refrain) 
And in that pumpkin (echo) There are some seeds (echo)
The slimiest seeds (echo) That you ever did see (echo)
The seeds are in the pumpkin... Vine...Field...Farm...Spooks...BOO! 
(refrain)

What to do:  This song can be done many ways, depending on the age and ability of the child.  With my older 3’s and 4’s, we first make a flannelboard story (see picture above), then listen and sing along with the cd.  Sometimes I draw a barn on paper.  I ask the children to add the bats, vine and pumpkin with markers.    
   As the children become familiar with the song, they can get up and fly around as bats, coming back to the rug to sing each verse.  If space is an issue, they can always remain seated and flap their “wings”.   


You can also do motions for the song:
Barn:  Trace a rectangle in the air with your pointer fingers
Vine:  Squiggle one pointer finger from overhead to the floor
Pumpkin:  Connect thumbs and pointers to make a circular object
Seeds:  Wipe hands together as if something is gooey!

NOTE:  we talk about the sound an organ makes, as it can be scary to a child who has never heard one before.  Also, I tell children, “If at any point in the song you feel a little scared, snuggle up to a teacher or friend.”  Most children seem to like “just a little spooky.”  Some just go for the snuggle because it feels good!


THE BOOK:  THERE WAS AN OLD LADY WHO SWALLOWED A BAT by Lucille Colandro (available on Amazon or Scholastic Books) 
    This delightful book (and the others like it in the series) will have kids giggling in no time!  Sing it to the traditional tune for “The Old Lady Who Swallowed a Fly”.

                                                                                             
THE CRAFTY PROJECT:  FINGER BATS!
                                                                                                         Cut a 2-3” bat out of paper or funfoam.  Staple it to a small ponytail holder or scrunchie.  The children can slip it onto their fingers, bat on top of their hand, and “fly” it around the room.  It’s been my experience that having a bat prop helps them to move their arms higher and lower because they focus on making the bat fly.

    Remember – bats are good animals. 
BAT FACTS:  They don’t get in your hair.  They eat bugs – especially mosquitos, which makes them VERY good in my opinion.  They sleep in the daytime and fly around at night (using echolocataion – which makes them NOCTURNAL – a nice new word for growing vocabularies.)  Try this website for more great facts: Bats4kids.org.

                          Now – GO BATTY!

Yours for a Song,
“Miss Carole” Stephens                                                   
Macaroni Soup! Active Music for Kids!

Monday, October 15, 2012

Montessori-Inspired Friendly Ghost Activities

By Deb Chitwood from Living Montessori Now
 
Montessori-Inspired Friendly Ghost ActivitiesI LOVE a non-scary Halloween! When Halloween isn't frightening, it's a great way to add excitement to learning. Today, I'm sharing ideas using some fabulous free ghost printables. I used the printables to create hands-on activities for preschoolers through first graders. 

Of course, ghosts aren't a typical part of the Montessori curriculum, but many progressive Montessorians like me enjoy using friendly ghost activities before Halloween to make the holiday less scary for preschoolers ... and because they add interest and fun to learning activities in October.

The printables I'm using are from Three Ghost Friends, Learning Ideas - Grades K-8, and 3 Dinosaurs. All three sites specialize in hands-on learning fun, and I'm just sharing ideas from very few of their printables. 

Ghost Color and Shape Scavenger Hunt Mini Sensory Tub 

Ghost Color and Shape Scavenger Hunt Mini Sensory Tub  

Eric at Three Ghost Friends has LOTS of fun ghost activities ... and who could be frightened by these friendly ghosts?! I had fun creating a "Boo! I Found You! Homemade Look-and-Find Game." In the original post, the printable is used to create an I-Spy bottle, which is a great idea. I decided to create a sensory tub using the printables.

Montessorians use "ellipse" as the term for what most people call an "oval" and "oval" for a 2-dimensional egg shape. Eric was kind enough to add a special printable for Montessorians with an "Ellipse Ghost" instead of an "Oval Ghost." He also created a larger version of the printables for a sensory tub.

Instead of making a regular-size sensory tub, I found a shoebox-size tub at Dollar Tree to make a mini sensory tub. I used sunflower seeds so preschoolers could have a snack at the end of the activity. I included various types of tongs, a scoop, and a nutcracker (for preschoolers who couldn't open the sunflower seeds with fingers alone). I also added 4 LED tealight candles from Dollar Tree. Turning the candles on during the activity and off when the activity is put away adds another practical life activity to the sensory tub. 

If you use the smallest printables, it's quite challenging to find the color and shape ghosts. So even older preschoolers could have fun with the activity. Note: This obviously isn't intended for toddlers. Not only are the sunflower seeds dangerous for them, but the shapes are too small as well. For toddlers, it would be better to make the I-Spy bottle with the shapes. If you'd like another activity for toddlers, check out the "Feed the Ghosts: Color Craft Stick Sort," using 2 32-ounce containers and colored craft sticks. 

Three Ghost Friends also has some great printables for "Spell Your Color Words with the Three Ghost Friends" and "Spell Your Shape Words with the Three Ghost Friends" (including special lower-case versions for Montessorians).
 
Ghost Counting Wheels Tray

Ghost Counting Wheels

Three Ghost Friends has a "Ghost Counting Wheels" printable with counting wheels for 1-6 and 5-10. This tray was very simple to prepare. I just printed out the counting wheels, laminated them, and cut them out. If your activity will have heavy use, be sure to cut out your wheels before laminating and leave a laminate edge.

I added numbers to the clothespins (with the exact number of clothespins for the counting wheels) with a permanent marker. The tray is an inexpensive wooden tray from a hobby store.
 
For many more hands-on activities from 3 Ghost Friends, check out the "Activity Ideas" page.

Ghost Numbers and Counters

Ghost Numbers and Counters Tray

Learning Ideas - Grades K-8 has "Friendly Ghost Odd and Even Sort and a Linky Party" with super-cute, friendly ghosts. The linky party even has more friendly-ghost printables. I loved these printables for creating a DIY numbers and counters activity. To make 55 ghost counters, I added eyes and mouths to lima beans with a permanent marker ... easy peasy! The tray is a black Economy Tray from Montessori Services.

Ghost Numbers and Counters Layout

When showing how to do the layout, I recommend placing the lima-bean ghosts in rows of two with a leftover ghost centered below the last row. It's a standard Montessori layout for cards and counters and gives a visual representation of odd and even. If you have exactly 55 "ghosts" for the numerals 1-10, that will serve as a control of error. You could even add more numerals (the printable has 1-99) and the cute "odd" and "even" ghosts if you'd like to add an odd-and-even activity as an extension for children who can easily count and identify 1-10.

Montessori-Inspired Ghost Addition, Subtraction, and Counting Activities

Ghost Addition or Subtraction Tray

The Halloween Pack from 3 Dinosaurs is HUGE! The pack is designed for ages 2-7 and includes literature-based activities. This pack has all sorts of very-cute Halloween images, including very-cute and friendly ghosts. Some of my favorite printables are the ghost addition, subtraction, and counting pages.

These are amazingly simple to prepare. Many of the 3 Dinosaurs printable packs have counting, addition, subtraction, greater than/less than, and/or word problem printables with numbers that are interchangeable. I just used the numbers from the "Montessori-Inspired Ocean Math Activities" I prepared in June. I would probably put both the addition and subtraction pages on a tray for children who are ready for them.

Ghost Addition Activity

For presentation ideas, check out the Montessori-Inspired One Fish, Two Fish Addition Tray in my February post here. You should be able to easily adapt the presentation for this activity.

For younger children, I would make a separate "Count the Ghosts" tray. For each tray, be sure to have the exact number of ghosts needed for the highest sum or difference or to go to the highest counted number you're using in the activity. I like to use 3-dimensional objects whenever possible, so I used the lima-bean ghosts for the activity. 3 Dinosaurs has very cute ghosts that can be printed out and used if you prefer.

Ghost Writing Tray

Ghost Writing Tray

In the Halloween Pack, Cassie from 3 Dinosaurs also has a fun creative-writing activity for children who are starting to write stories. Just print out as many pages as you need for your homeschool or classroom and store them on a tray. If you don't have a separate place for pencils, you could add a Halloween pencil for extra interest. Younger children could always dictate a sentence or story to you if they'd like to create their own ghost story.

More Montessori-Inspired Halloween Activities

You'll find lots of Montessori-inspired Halloween activities and ideas in these posts at Living Montessori Now: Montessori-Inspired Pumpkin Activities, Homeschool Halloween, Montessori-Inspired Pumpkin Unit, Montessori-Inspired Halloween Activities, and Halloween Grace and Courtesy. I also have a Kids' Halloween Activities Pinterest Board with Halloween activities of all kinds.

Have a fun Halloween! :)


Living Montessori Now
Deb ChitwoodDeb Chitwood is a certified Montessori teacher with a master’s degree in Early Childhood Studies from Sheffield Hallam University in Sheffield, England. Deb taught in Montessori schools in Iowa and Arizona before becoming owner/director/teacher of her own Montessori school in South Dakota. Later, she homeschooled her two children through high school. Deb is now a Montessori writer who lives in Colorado Springs with her husband of 37 years and their cat of 11 years. She blogs at Living Montessori Now. Linked to Tuesday Tots, The Mommy Club Resources and Solutions at Milk and Cuddles and Crystal & Co. , Enchanted Thursdays Blog Hop, The Weekly Kid’s Co-op, Living Life Intentionally Linky Party, Preschool Corner, Saturday Show & Tell, Show-and-Share Saturday, The Sunday Showcase, Link & Learn, Afterschool Express, Discover and Explore: Halloween

Saturday, October 13, 2012

Students Celebrate International Day of Peace

The General Assembly of the United Nations declared September 21st as the International Day of Peace.  Since the first year of celebration, many schools around the country have used that commemoration to influence children on the importance of world peace.  So this past September 21st, I took a film crew with me to an amazing Montessori school, deep in the Berkshires of Massachusetts to see what they were doing.

Everything I teach in my parenting program and all that I feature on my television show is dedicated to increasing the peacefulness in families and classrooms.  If we hope to have less war and conflict in the future, and more love and compassion for one another, then it's up to us to cultivate that in our children who will be responsible for carrying out the plan.

The director of this school, Meagan Ledendecker, asked each of the classes at the Montessori School of the Berkshires, to create a project that would represent their own celebration of world peace.  Upon hearing about this challenge, it became my goal to capture on film, many of the class projects that would eventually be put on display for all the parents to see.  The clip below is an excerpt from the most recent episode of my television show, featuring some of the activities at the school on this day.


The school featured in the clip above (http://youtu.be/5QLgf-dNGTg) is making a major contribution to bringing about more peace in the world.  And parents can be make a difference with their children as well.  In the clip below (http://youtu.be/xnOHQkPpdLs) from the same show, I offered parents 10 tips for raising a more peaceful child.  See if you're doing any of these with your family.


Watch my show, Creating Cooperative Kids, on your local public access TV channel.  If it is not currently airing in your area, watch it for free at http://www.TheParentingShow.tv.  


Join Bill's Email Newsletter Mailing List
Email:
For Email Marketing you can trust


Bill Corbett author of the book Love Limits & Lessons
Bill Corbett is the author of the award-winning parenting book series, LOVE, LIMITS, & LESSONS: A PARENT'S GUIDE TO RAISING COOPERATIVE KIDS (in English and in Spanish) and the executive producer and host of the public access television show CREATING COOPERATIVE KIDS (http://www.CooperativeKids.com). As a member of the American Psychological Association and the North American Society for Adlerian Psychology, Bill provides parent coaching and keynote presentations to parent and professional audiences across the country. He sits on the board of the Network Against Domestic Abuse, the Resource Advisory Committee for Attachment Parenting International, and the management team of the Springfield Parent Academy. Bill's practical experience comes as a father of 3 grown children, a grandfather of two, and a stepdad to three.  You can learn more about his work at http://www.BillCorbett.com and http://www.StopTheTantrums.com.

Thursday, October 11, 2012

Fall: Pumpkin Patch, Scarecrow + Fire Station

{Note from the editor. We're having a few challenges in blog-land. MaryJo has a gazillion ideas to share, but the photos are having an issue being uploaded. They are well worth your returning to see them and will be inserted at our earliest convenience. In the mean time: use your IMAGINATIONS!}

photo of: Fall Season Activities at PreK+K Sharing from Mary Jo Huff
Fall Leaves Begin to Herald Season's Change

The beauty of our world is peeking through my windows.  The leaves are so many different colors, the fall flowers are in full bloom and the air is crisp.  This is a favorite time of the year as I drive back roads from Southern Indiana to Chicago, Atlanta, St. Louis, Indianapolis and down to the Smoky Mountains of Tennessee. I pack my orange suitcases, grab the puppets and away we go.  Children are so receptive to learning about the changes, the seasons and different types of songs, finger plays and food.


One of the best ways to get parents involved with the children is to create books that travel from school to home and back again.  These books are kept in the classroom so children can read and reread during the year and reference what time of the year the book was made.The pumpkin pattern is from Jonesborough, Arkansas.  It laminated with 5 mil. Laminate and attached with a metal ring.  The holes on the white pages are reinforced with circle reinforcements.

The children visited the local pumpkin patch and took their own pumpkin home after designing a face on the pumpkin.

PARENT DIRECTIONS:  Share your favorite pumpkin picking adventures.  Your child will illustrate and dictate and return the book the following day.
Pickin’ Pumpkins in the Pumpkin Patch is a song by Jim Coffey and can be found on the CD Peeper Pizzaazzz along with the story of the Orange Ghost on Storytelling for Kids.

A visit to the local fire department is always a highlight for children and attending parents. After the trip this book was sent home so the children could dictate their favorite thing at the fire station.  If you cannot visit the fire station call your local volunteers and ask if someone can bring the fire truck to your school or center. 

Take It To Your Seat activities are designed by Evan Moor a great publishing company.  The pictures are in color and all you need to do is cut them out and attach to a bag.  The best idea is to purchase or ask for donations of bags and attach the SCARECROW to the outside with Velcro.  

The directions are attached to the back with Velcro also.  This way when the bag is worn all you have to do is replace the bag.
Inside the bag are the interactive TAKE-IT-TO-YOUR-SEAT activities.   This idea was used the entire year and was set up as a center.  When the children understood the directions it became a favorite center and they always anticipated the changes in the bags.  The items attached to the bags were laminated with 5 mil. Laminate as were the activity cards.

Product DetailsThe Scarecrow's Dance

Two of my favorite books to read along with others listed on my website.  
Yes I read!!!  Someone asked me if I always told stories and I said “Of Course I do!”  then I realized that they were referring to reading to children.  I read all the time as tI still do with my grandchildren but when  a good story begs to be told and retold I am on it right away.
I will insert a few pages from a parent/child, class book.  These ideas worked to connect our families and to get the children ready to become the best readers.

Each child had a page in the book and as you can see some parents spent lots of time and others just had a cup of coffee.  No matter what the seeds were planted for parent involvement.  This book was recopied and each child took a book home.  We did this several times during the year.  Budget restraints kept us from sending home a copy of every book.

photo of: English Muffin Jack-o-Lanterns via MaryJo Huff at PreK+K Sharing

Enjoy a healthy food activity to accompany this time of the year.
INGREDIENTS:  Volunteers to help so each child can create their own edible pumpkin.
  • Raisins
  • Cheez Wiz
  • English Muffins
  • Spreading knife
  • Toaster

DIRECTIONS:  Invite the children to choose a toasted English muffin half.  Place the muffin on a paper plate and direct the children as to spreading the Cheez Wiz on the muffin.  Tell them to cover the top of the muffin.  After they are finished spreading the cheese on the muffin tell them to use the raisins to make a face on the muffin.  They can then eat the muffin for their snack.


Each year at this time we talked about and explored spiders and how they spin a web.  The following picture is of a paint reverse.  Be generous with Elmer’s Glue to make the pattern of a spider web and paint it white and place a piece of black paper over the painted web, and rub it with your hand.  The children spend many minutes rubbing the paper because they can feel the web under the paper.  Pull the paper off and hang to dry.  Children are always amazed at this process and it can be repeated throughout the year with different shapes.
This web is black and was reversed on orange paper.

Have a great rest of the month and keep the children’s minds wondering what you will come up with next.  Some call this intentional teaching (a new buzz word) but at our center we have always taught with the intention of the children learning while having fun.

Check out my web site at www.storytellin.com to find the CDs with music and stories, and sign up for my newsletter.  
Mary Jo Huff, Author, Storyteller, Puppeteer and Song Writer.


Wednesday, October 10, 2012

Pumpkin Sun Catchers

This is an adorable little project that promises great results and focuses on fine motor skills!
You will need:
black construction paper
white crayons
1 roll clear contact paper (cut into 12x8 pieces, 2 for each child)
1" cut squares of orange tissue paper
twine, ribbon, or string
First, we read the book "The Bumpy Little Pumpkin" by Margery Cuyler and talked about our pumpkin traditions at our own houses. Next, we used white crayons to draw our jack-o-lantern's face...and our name (we need this for later!)
Next, the students cut their features out of the black paper, and cut their names out too! They stuck their facial features onto a piece of clear contact paper (I've found that I used the 12" rolls and cut the pieces 8"x12" and this size works just fine. Of course you could make it bigger or smaller!) When finished, they flipped their name over and stuck it on too so it would be visible from the front of their project
The students then used orange pieces of tissue paper to create their pumpkin. This was a great lesson on "implied shape" and "implied line" since they had nothing to really work off. If you had ESE students, or students younger than PreK that are doing this lesson you could put a paper circle template UNDER the contact paper so they had a shape to work off of...but I kind of like how each one turned out a little bit differently! In fact, we discussed how each pumpkin in the pumpkin patch is a little different and that's what makes hunting for the "perfect pumpkin" at the pumpkin patch so much fun!!!

I then stuck a second piece of contact paper to the back, punched holes in them, and looped some twine through. the kids just ADORE them and so do I!

These sun-catchers are meant to hang in a sunny window so the sunlight can glow through the tissue paper. Of course not ONE student would let me keep theirs to hang in the windows of my classroom. Little boogers all wanted to take them home! Gah! The nerve!!!


Hope you're inspired...and Happy (early!) Halloween!

Joanna Davis-Lanum is a National Board Certified Art Teacher and teaches at Garden Elementary School in Venice, Florida. She is the author and voice behind her classroom blog We Heart Art. She loves her little pumpkins, even though sometimes they are tricks instead of treats!
Related Posts Plugin for WordPress, Blogger...