Pages

Friday, April 29, 2016

Are Your Professional Development Trainings Completed For This School Year?


Hi everyone!  Cheryl Hatch here from Preschool Plan It!

Can you believe the end of the school year is so close?  There is so much planning going on for end of the year and graduation activities for the children, we sometimes forget about our end of the year needs!

We all become so busy with the end of the year buzz that the things we need to do for US becomes foggy and/or forgotten!  One of these areas is professional development.  

Training can be fun or just something you feel you need to "get done".  Please don't let it be the latter!  We should always be learning, growing and networking in our field!  It is what keeps our passion strong!

Last night, my husband and I got together with friends and decided to order Chinese food. My favorite part of this meal is the reading of the fortune cookies.

Okay, wait.  That is not entirely true.  The BEST part is the Crab Rangoon which is a meal in and of itself as far as I'm concerned!  :)   But the reading of the fortunes in the cookies is a close second!  Here is what was in my cookie:


How true is that?  Not only for the children in our care, but for US!!!!  

My friends asked if I'll be lighting any educational fires.  I shared with them that I will be going back to school next year to complete my M.Ed.  So how timely that THIS was in my cookie last night!  :)

But that is next year.  This year, I have many courses I want to take! 

For your program, your own college classes might qualify for in-service hours.  They might not. But, don't limit your learning based on what you "need" to get!  Light A Fire!  It's the only way to remain an advocate for the children you work with!

You may need to have state approved trainings or find trainings on your own.  

Your program likely has a set requirement with regard to the number of hours of training you need to receive.
There are many ways and places to find these.

First, however, you need to know where you stand and which areas you want to learn more about

There are many places online that provide such trainings, including my website.

I want to share all of these resources with you to help you get started NOW to find trainings.


                           1.  Articles and/or Books


Choose a selection of articles or a book that focuses on an area you want to develop in.

Read it (on your own or as a small group with co-workers).  

Write a review that discusses what you learned, how the information will help you in the field and list 3 ways you will put the information learned into action in your classroom.

2.  Live Workshops & Trainings

Check your area associations (NAEYC, AEYC for your state, etc.), hospitals and other facilities for training opportunities.  

I have listed many suggestions on where to find articles, my favorite staff book training studies and where to look for local workshops and trainings on this page in the Preschool Director section of my website.

Also, be sure you are tracking your workshops!  Looking at what you have participated in at a glance will help you determine which areas you want to focus on next!
I've put together a free, 1-page download for you to use to track your annual training hours.  


Again, you'll find the ideas from this post on my Professional Development Ideas page here as well!   


                 3.  Online Trainings from Yours Truly!

Yes, bit of a shameless plug.  ;)  In addition to the links and suggestions I have for you on the pages listed above, I also offer 2 trainings on my website.

They each in a self-study format, meaning you complete the activities at your own pace and you are provided a 4-hour certificate of completion when done.  


Math in the Preschool Classroom will help you to:

Define math.
Learn the basic math process skills that preschoolers develop through math activities.
Learn how teachers have traditionally presented math to preschoolers and how you can do so in a developmentally appropriate way.
Learn how to assess your current students’ math skills.
Learn how to set up a Math Interest Area in your classroom.
Learn math activities to implement throughout your classroom.
Plan math activities for each interest center in your own classroom.

 Science in the Preschool Classroom will help you to:

Define science.
Learn how to set up a Science Interest Center in a preschool classroom.
Learn to plan informal and formal science learning activities.
Learn the basic process skills that children discover through science activities.
Become familiar with the general science areas.
Learn ways to implement science throughout your classroom.
Begin writing a science based theme for your classroom.

These workshops may or may not qualify in your state for in-service hours. (You can read the state listing on the page to find out).


Summary

NOW is the time to start looking and planning your hours so that you are not in panic mode at the end of May trying to complete those last few hours of training!


Check out the pages I listed above to get started finding either online, live or book study type trainings now!

Happy searching, planning and learning!

Cheryl

About the author
Cheryl Hatch has taught and directed preschool programs for over 20 years.  She is the Creator and Owner of Preschool Plan It, a website dedicated to sharing preschool themes, activities, articles and training with early childhood educators.  She volunteers as the coordinator and teacher of the MOPPETS program in her town (a preschool program for the M.O.P.S.--Mothers of Preschoolers Program).  She has her undergraduate degree in Early Childhood Education.  Cheryl has been an active, integral member and leader within the Teachers.Net Early Childhood community for many years, moderating live chats and providing peer support on the Preschool Teachers Chatboard.  You can read Cheryl’s articles, activities and themed preschool lesson plans at www.preschool-plan-it.com 


Monday, April 25, 2016

Flower Songs

Spring has sprung!   I've decided to post a generic "Here are some songs about flowers" blog and deviate a bit from my normal posts.  Here goes:
                  
This is video from Thane, India.  Food is an important part of life; therefore, no matter where you travel, children will sing songs about plants.  This was adorable to watch.  Although, the American in me (and Debby Mitchell) both wondered about how we would never be able to let children climb from chair to table without being told "Someone may get hurt.  Find another way."   When that child stood on the table and no one flinched, we both were pleased (and worried) at the same time.  Yet, these children TOTALLY understood the concept and were VERY proud of their performance.
Connecting children to nature, having them understand where their food comes from is important for their understanding of how life is all interconnected.

The brain understands things more easily and retains things longer when we use movement because movement involves the motor cortex.
Moving large and small muscles through singing and movement may lead to longer-term recall Flohr & Trevarthen, 2008

"From Seed to Flower"    is a fun song to do with children (ages 4+).  Follow the words and have the children pretend to be the seed growing into the flower.

Sit all curled up in a chair.  Pretend you’re a seed, under dirt, in a cup
Push your roots way down.  Stand your stem straight up
Put your hands on your hips.   Like leaves on a stem; One on each side
Your head has the petals for the flower.   What kind?  You decide.
Stand tall, pretty flower.   Where you stand, you will stay
Your roots down in the ground will hold you as you sway

Start children seated in a chair as the song directs.  Ask them what type of flower they've decided to be.  At the end, have them sway from side to side while singing "seed to flower, seed to flower. That is how a flower grows."

Another fun song to act out is Relaxing Flowers.  For this you can use fingerpuppets of five flowers OR you can have the children BE the flowers.  
Five little flowers, standing in the sun.  See there heads nodding, one by one? 
Down, down, down comes the gentle rain and 
The five little flowers lift up their heads again. 

Build your gardens.  Go outside and pick flowers.  
Read books and sing songs.
Enjoy Spring!
Maryann "Mar." Harman 
Music with Mar.
Music with Mar., Inc Brain Facts on Facebook


Saturday, April 23, 2016

Repurposing Dramatic Play

It's Scott from Brick by Brick. I love to repurpose materials—use materials in ways different from their intended purpose.

Dramatic play, pretend play, is such a great activity for preschoolers. They love to pretend to be someone else - to try out different roles. And your home center or dramatic play center is a great place to repurpose items for play. Here are a few ideas.

Empty food containers - use the container for pretend cooking or to play grocery store.


Bed sheet - toss a flat sheet over a table for an instant tent for camping or for a reading nook


Old technology - use old keyboards, phones, and other technology for office or communication play.


Kitchen utensils - mix in "real" mixing bowls, spoons, spatulas, cookie sheets, and cutting boards with play dishes for more cooking possibilities


Boxes - use old mailing boxes to pretend to pack and move


Tools - use tape measures, goggles, and work aprons from the hardware store to enhance play with pretend tools


Draining rack - add a real draining rack to a dishpan of water to wash dishes.


Purses and wallets - adding purses and wallets from the dollar store or thrift store can enhance all kinds of shopping play


In many cases, we don't necessarily use something in a completely different way. But we use "non play" items for play. Look for ways to repurpose different items and real tools to create even more fun possibilities in your dramatic play center.

Saturday, April 16, 2016

Do "The Shaker Hop!"

Hooray! Spring is arriving 
(finally) in Chicago, and here I go - Miss Carole of Macaroni Soup! 

           HOP HOP HOP

It’s a great time for you to pass out shakers and get hopping, too!  Indoors, outdoors – wherever!  
    Wait – you don’t have any shakers?  Make bottle shakers or buy some egg shakers – see directions below.


But first – “The Shaker Hop!”  Hear it HERE, or on my DANCING FEET recording.  It’s a hybrid of “The Bunny Hop” and “The Hokey Pokey” or “Looby Loo!”  So easy – SO MUCH FUN!  All you need is some kind of shaker or maraca – one for each child.

LYRICS:  
Put your shaker in, put your shaker out
Do “The Shaker Hop” – Hop! Hop! Hop!
Put your shaker in, put your shaker out,
Do “The Shaker Hop” – Hop! Hop! Hop!
Put your shaker in, put your shaker out,
Do “The Shaker Hop” – Hop! Hop! Hop!

(Marching or dance break**, then repeat sequence.)

Up and over to put the shaker out!


Yup – it’s that simple.  We often start in a circle – it makes the in and out motion less dangerous.  Another tip from many years of shaker hopping – teach the children to rainbow arc the shaker overhead when going from “in” to “out” – they are less likely to whack each other!


Watch where you're going when it's BACKWARD!


** I vary the dance break – sometimes we march, sometimes we boogie!  We even walk backward (with my 4’s and K’s), walk low, walk on tiptoes – ask your students for a new way to move each time you do it and add it in.  Their creativity (and difficulty) will astound you!
HOP! HOP! HOP!


Let’s make bottle shakers – it’s not hard and it re-uses plastic bottles and newspapers you might be recycling anyway.  Save enough 12 oz or smaller bottles – the sturdier ones will last longer.  NO WIDE-MOUTHS.  If the bottle makes a crinkly sound when you squeeze it lightly, find a different bottle.  Often the best bottles are from carbonated drinks – my latest fav is Ice Mountain Sparkling Waters.  Got a 24 pack at Costco, enjoyed the bubbly then made shakers for a whole class!


STEP 1:  Fill each clean, DRY bottle with ½ cup of filling – beads, buttons, popcorn, or rice.  If using beans, be sure to rinse and dry completely or they will sprout in a few days (yes, I speak from experience!)  Remove the label and plastic ring left when the cap was removed.

STEP 2:  Make a handle.  Cut a section of newspaper (8 pages) from the fold side across – about a 4” hunk.  Then roll tightly from the fold side to make a compact cylinder.  Stuff it into the top of the filled bottle.  If it’s too big, unroll and take off one or two sheets of newspaper and re-roll.

STEP 3:  Duck Tape!  Cut a 3-4” length and drape it over the top of the handle.  Fold in the sides.  Then wrap more tape from the top of the handle to the bottleneck (securely over the ridge where the cap sat) and then all the way back up to the top.  Two layers of tape will make your shakers last longer.  Some of mine are still shaking after 15 years of glorious music-making!


NOW SHAKE IT, BABY, SHAKE IT!                  

Watch the video for a step-by-step demonstration on my Facebook page!

My 4’s and K’s help make their own shakers.  They prep and fill them.  Then I give them a laminated nameplate to slip into the bottle before the handle goes on.  It’s easier for them to identify their own bottle shaker later.  My K’s wrap the colorful duck tape of their choice – some 4’s can do this step, some require assistance.  At the end of the year, each child takes their shaker home.


Children love to compare and examine what's in a shaker.  You might ask them to find another child who has the same color handle or same filling before shaking it up!


We're having fun now!
  • NOTES:  If you have a child that is sensitive to loud noises, encourage them to choose rice, colored sand or cottonballs for inside their shaker.  It’s easier on the ears!
  • Making a handle for a shaker turns it from a science project into an instrument. 
  • Do not use cereal as filler – it breaks up and turns to powder in short order.

We put our shakers away by the color of the handle.
Egg shakers are great, too!  Please do not make them out of plastic Easter eggs.  If they break, they turn into sharp shards that can injure a child.  Likewise the inexpensive egg shakers on Oriental Trading – they can split open after a few uses.  Purchase quality shakers from West Music ($1.75 ea, less if purchasing 10 or more),  or Rhythm Band Instruments (2 for $5.99 or 12 for $20.99) – worth the investment as they’ll last many years safely.


Another great shaker song:  “We’re Going to Kentucky!” on my Baloney! recording.
Check my YouTube Channel next week - I'll have video of "The Shaker Hop" ready then!

            WHAT HAVE YOU GOT SHAKING?

A big thank you to Rindy Powell, Director and superb photographer, and Mrs. Johnson and Mrs. Koek's class at St David's Nursery School in Glenview, IL for shaking and singing with me.  Another shout out to 3's teacher Mrs. Michols for the beautiful artwork behind me in the shaker-making video!


Yours for a Shaker Song!                    
 “Miss Carole” Stephens

Need professional development, a conference keynote or school visit?  Contact me:
PHONE: 847-384-1404


Friday, April 15, 2016

Montessori-Inspired Recycling Activities Using Free Printables

By Deb Chitwood from Living Montessori Now 

I clearly remember celebrating Earth Day with my (now 31-year-old) son back in the 1980s. I love that the celebration is continuing in 2016! Today, I have ideas for Montessori-inspired recycling activities using free printables. 

You'll find LOTS of free recycling printables in my Free Recycling Printables and Montessori-Inspired Recycling Activities. Here, I'm sharing some Montessori-inspired recycling activities using free printables for preschoolers through first graders. You'll find many activities for preschoolers through first graders throughout the year along with presentation ideas in my previous posts at PreK + K Sharing

You'll also find ideas for using free printables to create activity trays here: How to Use Printables to Create Montessori-Inspired Activities. At Living Montessori Now, I have a post with resource links of Free Printables for Montessori Homeschools and Preschools

Disclosure: This post contains affiliate links at no cost to you. 

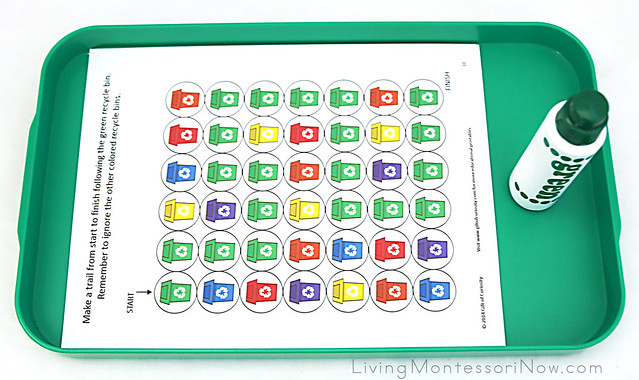
Do-a-Dot Recycling Bins Color Activity Do-a-Dot Recycling Bins Color Activity Free Printable: Earth Day Do-a-Dot Printables from Gift of Curiosity 

This activity couldn't be easier to prepare once you have the necessary materials! I just printed out the page with the green recycling bin trail from Gift of Curiosity. I added Do-a-Dot markers. After your child has finished with the green trail, you could have him or her match the other colors of recycling bins with Do-a-Dot markers. The tray is a large plastic tray from Montessori Services.

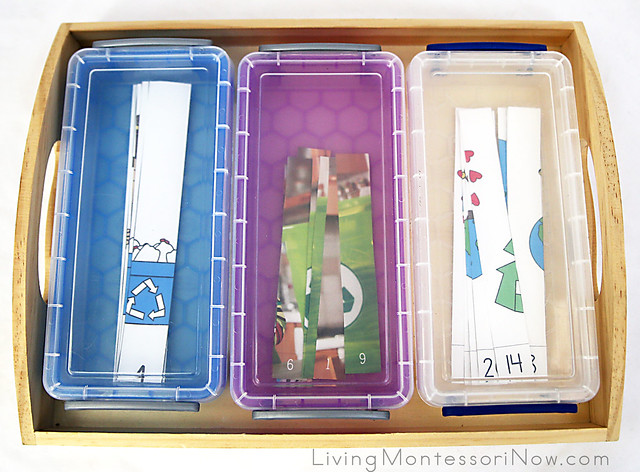
Recycling Number Puzzles for 1-10 and 11-20

Recycling Number Puzzles for 1-10 and 11-20 Free Printable: Number Puzzles 1-10 from Earth Day Pack and Earth Day Puzzles at Totschooling 

Free Printable: Number Puzzles 11-20 from Earth Day Pack (PreK Pack Part 1) at Royal Baloo 

This was another simple activity to prepare! I just had to print out, laminate, and cut out the letter puzzles. I added them to a wooden tray I got a few years ago at Michaels craft store. There are more puzzles available in the printables, so just choose the ones that are best for your child or students. 

I used .55 liter Really Useful Boxes. They're available on Amazon, although I got mine on sale at an office supply store. 

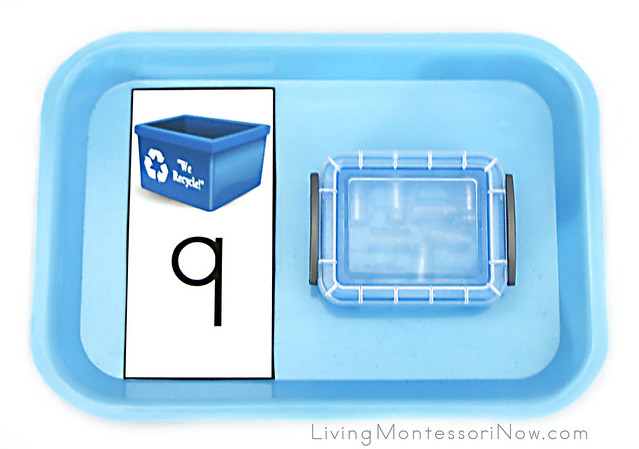
Counting Activity with Recycling Bin Number Cards Counting Activity with Recycling Bin Number Card and Miniature Glass Bottles

Free Printable: Recycling Bin Number Cards (part of my subscriber freebie pack, so just sign up for my email to get the link and password ... or check the bottom of your latest newsletter if you're already a subscriber). 

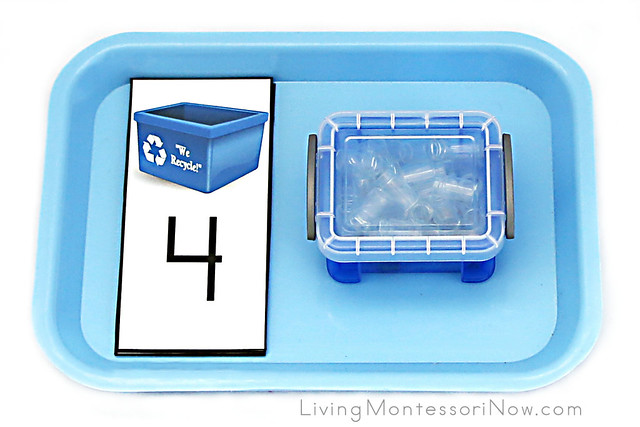
For toddlers (who don't mouth objects) and younger preschoolers, you could just have one number card with the correct amount of recyclables in a container. I found these very cool miniature glass bottle with corks. They come in sets of 50, so you'll need two sets if you want to prepare numbers and counters as shown below. These aren't as fragile as you'd think, but they're still best for children who will be gentle with them. 

Montessori sensitive periods show that children from ages 1½-4 are especially drawn to small objects and details. The miniature bottles add interest as well as a great fine-motor activity. I'm planning to use mine for a variety of activities.  Amazon carries .14 liter Really Useful Boxes, although the box I used for this activity is even shorter. Again, I found it on sale at an office supply store. You might also find a miniature recycling bin for office supplies that you could use instead. I used a Montessori Services medium-size tray to hold everything.

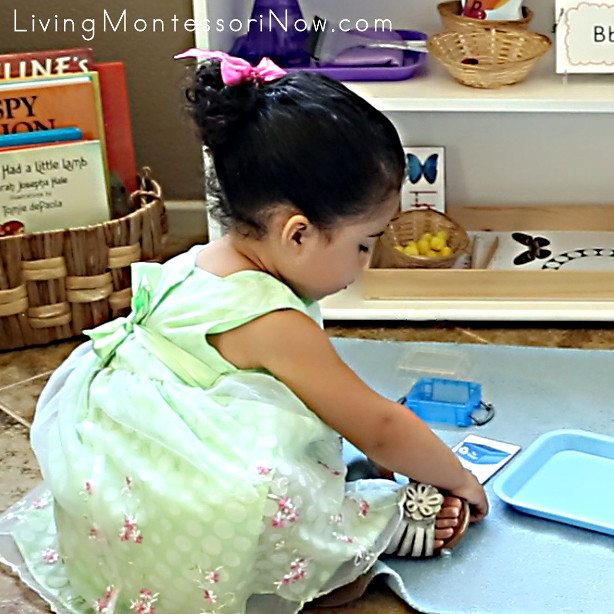
Counting out 9 Miniature Glass Bottles  

We use a Montessori Services rug for our floor work, although this activity would work well at a table. The 1-10 numbers and counters need to be done on a rug. For this activity, the child just removes the bottles from the "recycling bin" and counts them next to the card. This was a good way to let my almost-2-and-a-half-year-old granddaughter, Zoey, work with the mini bottles without having to count all 55 bottles. 

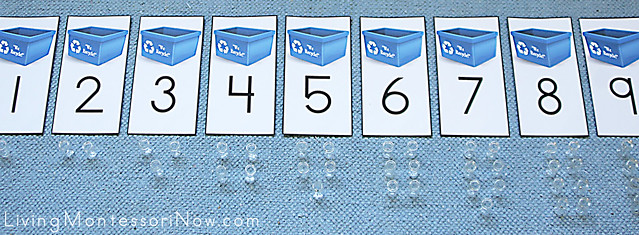
Recycling Numbers and Counters Recycling Numbers and Counters Free Printable: Recycling Bin Number Cards (part of my subscriber freebie pack, so just sign up for my email to get the link and password ... or check the bottom of your latest newsletter if you're already a subscriber)

Recycling Numbers and Counters Layout 

I love making DIY themed cards and counters to introduce odd and even and add interest and variety to cards and counters. Again, I used the .14 liter Really Useful Boxes that looked like little recycling bins along with the miniature glass bottles. You need exactly 55 bottles if you want to do the numbers and counters 1-10. 

Roll-and-Stamp Recycling Addition Activity

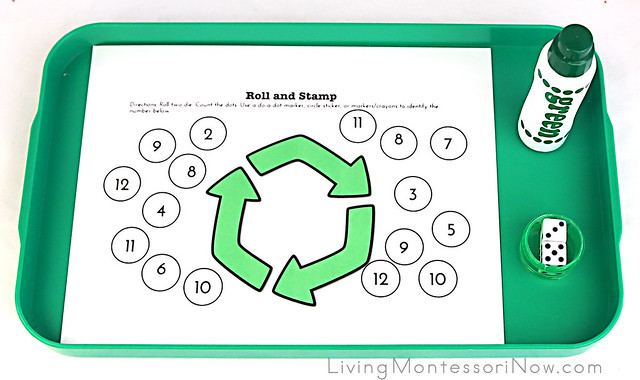
Roll and Stamp Recycling Addition Activity Free Printable: Roll and Stamp from Earth Day Pack at Homeschool Encouragement 

This is a super-easy activity to prepare. It uses two die along with Do-a-Dot markers, glass gems, or some other way to mark the numbers used, and a piece of paper for the printable! Younger children can count the dots to add the two numbers together while older children can work on remembering the facts, counting the dots if needed as a check. 

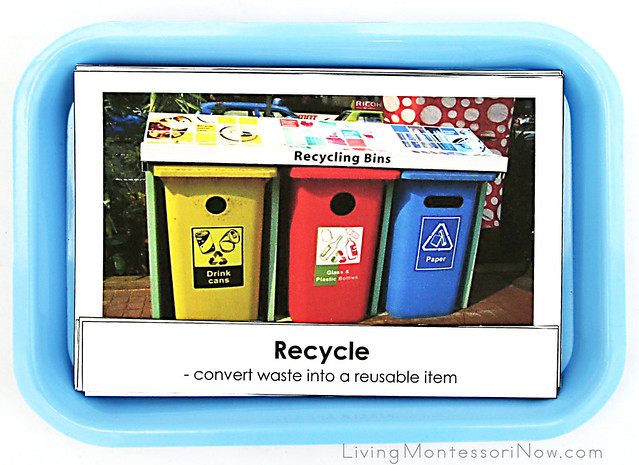
Earth Day Every Day Picture Cards and Labels Earth Day Every Day Picture Cards and Labels Free Printable: Earth Day - Every Day! Picture Cards and Labels from Montessori Print Shop 

I LOVE this printable from Montessori Print Shop! It's so helpful that there are definitions for the terms Reduce, Reuse, Recycle, Upcycle, and Protect. Then there are 15 real photographs with short captions that can be matched to the labels. It's a great way to discuss these important terms with young children. Older children can read and sort out the cards on their own. 

More Free Recycling Printables  

Go to my post at Living Montessori Now for links to free recycling printables from around the blogosphere: Free Recycling Printables and Montessori-Inspired Recycling Activities. And be sure to subscribe to my email list if you'd like to get an exclusive free printable each month (plus two more awesome freebies right away): Free Printables

You'll find lots of Montessori-inspired Earth Day activities and ideas in these Living Montessori Now resources:
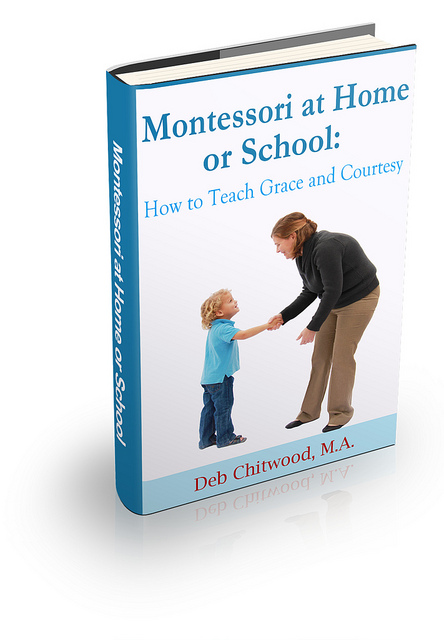
Montessori at Home or School - How to Teach Grace and Courtesy eBookIf you'd like to focus on manners with children, please check out my eBook Montessori at Home or School: How to Teach Grace and Courtesy! It's written for anyone who'd like to feel comfortable teaching manners to children ages 2-12. I'm also one of the coauthors of the book Learn with Play – 150+ Activities for Year-round Fun & Learning!
Happy Earth Day! :) Deb - Siganture
Deb Chitwood
Deb Chitwood is a certified Montessori teacher with a master’s degree in Early Childhood Studies from Sheffield Hallam University in Sheffield, England. Deb taught in Montessori schools in Iowa and Arizona before becoming owner/director/teacher of her own Montessori school in South Dakota. Later, she homeschooled her two children through high school. Deb is now a Montessori writer who lives in San Diego with her husband of 40 years (and lives in the city where her kids, kids-in-law, and toddler granddaughter live). She blogs at Living Montessori Now.
Living Montessori Now Button