Pages

Thursday, May 30, 2013

10 Ways to Make Your Own Art Supplies!


One of the things we tend to do a lot in our program is to make our own supplies- or do what we can to stretch those that are commercially purchased.

Making Homemade Play Dough

Our dough is soft and pliable- perfect for sculpting and working on those fine motor skills!

Clay Dough
When we decide that we are interested in keeping a sculpted product- we tend to use clay dough, this simple dough is much smoother and dries with less cracks than traditional salt dough recipes. It is also bright white in color which we love!

Scented Watercolors
We also make a wide variety of our own paints. Lately, we have been using a lot of watercolors! Our favorite recipe was one we adapted to make the colors scented.

Dried markers will make great homemade liquid watercolors!

When we do use commercially purchased paint- like tempera, I tend to use only a small amount of paint and add liquid laundry starch to the paint pots. This will thin the paint a bit and make it shiny! (I usually use about 3/4 starch and 1/4 paint) It makes our paint last much longer and keeps it from cracking when dried!

Homemade Finger Paints
We also use a lot of finger paint! This one is a fun recipe- but beware, it does not last. You cannot store this paint for a long period of time as it will mold.


We also tend to go through a lot of sidewalk chalk and sidewalk paint. I have not found making your own sidewalk chalk to be as cost effective as buying it in the store. However- we do make sure to use up every little bit of chalk. When the pieces become stubs- rather than throwing them out- we use hammers to smash them into powder on a wet sidewalk! The results are brilliant- vibrant colors everywhere!


When we don't have a lot of bits at the moment and are tired of regular sidewalk chalk- 

Make Your Own Sidewalk Paint
We make our own homemade sidewalk paint!

If you want to add a bit of science to the mix- you can 

and/or you can add pendulums to the mix!
Pendulum Painting with Sidewalk Paint! 
We like to recycle a lot too- 


This version is completely handmade- no electric appliances are used! The children love to make the paper and to use it for new art creations!

Do you make your own art supplies?
Do you have a favorite recipe?
I'd love to hear about it - Please share in the comments!


 More About Amy

Amy Ahola is the owner/operator of Child Central Station, group home daycare in Marquette, Michigan.  She has been running her own business since 2005. Prior to that time, Amy worked in a childcare center and public school. In addition to her childcare business, Amy also provides educational training sessions. Amy earned a Bachelors of Science in Psychology from Northern Michigan University and a M.S. in Training, Development, and Performance Improvement.  For more information about any of her programs, please visit Child Central StationAmyAhola.com or Find her on Facebook, Pinterest, LinkedInGoogle+InstagramTwitter, or Tumblr


Wednesday, May 29, 2013

Metamorphosis Freebie!


Hi everyone! This is Sue Cahalane from Science for Kids Blog, I'm here on the 29th of every month. We just had the Science Fair at our school and one of my students brought in silkworms & silk cocoons! What a great opportunity to show my little ones the amazing life cycle of a moth.

Aren't they crazy looking??!! It looks like they have tiny faces! They love mulberry leaves. When they pupate, they make their cocoons - perfect little ovals of silk!
2 salivary glands in the caterpillar's head secrete a long, continuous thread of silk creating the cocoon.  Inside the cocoon, metamorphosis occurs & voila! A white moth emerges!

This is the worksheet I use when I teach butterfly metamorphosis. Click on the worksheet to pick up a copy! 


I uploaded a freebie on poison ivy identification. Click on the pic below for a copy: 
For other science activities and freebies, please check out my Teachers Pay Teachers store, Facebook page, Pinterest page & my Science for Kids Blog!


Wishing you a safe and happy summer!


Monday, May 27, 2013

"Ms.Carissa Rocks" Joins PreK+K Sharing

Thanks for taking the time to make a difference in the lives of young children! I am Carissa Knoles, an Early Childhood Music Specialist, with a BGS in Children and Families from the University of Michigan and over 5 years experience teaching in accredited Early Childhood programs in Southeastern Michigan as well. As both a musician and Early Childhood Professional, you can imaging how “deep” my pockets are, so to speak, and that is why I would like to share with you a wide variety of handmade instruments you can make with young children, for young children and even just for fun! 


According to a study titled “Recreational Music-Making Modulates the Human Stress Response: A Preliminary Individualized Gene Expression Strategy,” (Medical Science Monitor 11 (2005) :31-40) making music resulted in the reduction of stress related hormones. When compared to other forms of relaxation such as reading, listening to music, or meditating actively creating music with instruments and/or vocals reduced stress hormones 3 times more! 


Party

 What better reason to make a little music with your children and families! In the field of Early Childhood, educators and parents strive to find ways to encourage children to complete tasks, even those ones such as cleaning their rooms! We work to stay away from rewards, as we want to build intrinsic motivation in our young children (ie. Children do the right thing because it makes them feel good. They clean rooms because they feel they've accomplished a complete task and because it’s easier to play in a clean environment, rather than just because Mom said so!)


In my music and movement sessions, I work to assess children’s interests and incorporate in my songwriting. One such observation involved children’s love for the Angry Birds games! As technology takes over, I owe it to young children to embrace it and even write a song about it! I created these angry bird puppets to use with a silly song I wrote about why the angry birds are so angry, someday to be recorded on my second full length album. 


I found computer images for free online, printed and laminated them and finally glued the image to popsicle sticks to create a puppet. In addition to flying around these angry birdies while I play my original tune in classrooms, concert halls and libraries around the US I would like to share an even easier way to engage children by incorporating their interests while also achieving our educational special objectives.


Chant the following to the tune of “If You’re Happy and You Know it…” and keep an eye on my website mscarissarocks for an upcoming video of this activity! “An angry bird is sitting on my head. An angry bird is sitting on my head. He is sitting on my head. He is sitting on my head. An angry bird is sitting on my head.” Then replace the word head with shoulder, back, belly, knee, etc… What a fun way to identify body parts! 

Encourage children to shout out their own ideas of where the angry bird can sit. As you reach the end of this activity, try “An angry bird is dancing all around!” for some additional gross motor fun! Participating in this large group activity provides children opportunities to build vocabulary as they identify body parts aloud as well as practicing following multi-step directions. Have fun flying your angry birds! Have a day that rocks!

-- Ms.Carissa -- 

Sunday, May 19, 2013

The Very Busy Spider- Children's Art and Literature


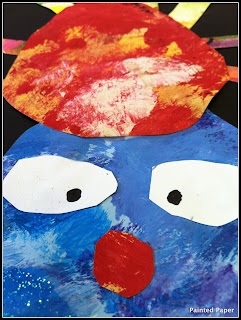
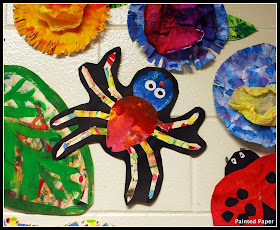
I just love Eric Carle's wonderful books! Guess what? So do my students! In my art classes, we studied creepy creatures that you might find in a rainforest.  One class created fabulous spiders out of painted paper inspired by his book, 
The Very Busy Spider.


This project was a simple project to do with the students and all students had fun creating their personal spiders.

Step One: Make the painted paper.  Use up old paint and have kids paint away! Let Dry.

Step  Two:  After reading The Very Busy Spider, have painted paper pre-cut in various sizes for the students to create their spiders.

 Next, look at the various shapes that make up the spider, 
tear drops, circles, and rectangles .

 After the main shapes are created and glued together have students add the details such as large eyes, mouth etc.


Legs are created by cutting strips of paper into short rectangles then glue together to make the long legs that crawl through spider webs and up trees!


 Lastly, give your spider a wonderful habitat to live in- 
Make fun flowers and leaves for your spider to crawl on.


Supplies:
Painted paper
construction paper
glue 
scissors

Laura is an elementary art teacher and the author of the blog Painted Paper. She has presented her thematic units nationally at the National Art Education Association and Ohio Art Education Association Conferences. You can follow her updates on fun and creative projects for kids here.


Saturday, May 18, 2013

"W" Sitting Alternatives: Needs + Rationale


What is “W” sitting?

Marianne Gibbs, EdD, OTR/L
Gibbs Consulting, Inc.


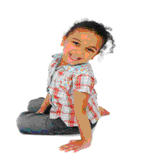
“W” sitting occurs when children sit on the floor with their legs bent in the shape of a “W”. Observe your students today and see how they sit on the floor at school and home. Do they sit in the “W” position?

            
Why do children “W” sit?
Children may develop a habit for “W” sitting as a way to establish increased stability in their bodies when they cannot assume and maintain the criss-cross (tailor) sitting position. Unfortunately, “W” sitting compromises knee and hip joint positioning, inhibits trunk stability needed for sitting, and may impact the development of proficient hand skills. 


What should teachers and parents do when a child is a “W” sitter?
Teachers and parents should gently, but firmly discourage “W” sitting. I recommend allowing a variety of sitting positions especially if kiddos are struggling or have pain sitting in the criss-cross position. All of the following positions support healthy joint development and learning.

Recommended Sitting Positions:


1.      Long Sit (legs straight out in front of torso)
2.      Side Sit (legs bent and tucked to one side)


3.      Lying on Tummy (propped up on elbows) 


4.      Lying on Back (propped up on elbows)


5.      Sitting on a small to medium-sized ball with feet connected firmly with the ground is a fun way to sit and gain coordination at the same time.


We should expect young children to move in and out of positions when sitting on the floor - that is natural and the way kids stay alert and learn to manage their bodies in space. Just as one size does NOT fit all, one sitting position will never accommodate the sitting needs of all children. Young children learn best when their bodies are safely and comfortably positioned. When you support a variety of appropriate sitting positions, you are setting all children up for success!

photo of: Write Out of the Box: Fine Motor Skills at PreK+K Sharing

Marianne Gibbs, Houston Occupational Therapist


Marianne Gibbs, EdD, OTR/L
Write Out of the Box


Note-from-the-editor: This is very significant insight and often "unknown" by parents. Would you please help pass the word by 'pinning' from this post? Your pin is the most direct way to circulate this information to a wider group. Please share directly with those that you have the opportunity to impact. Thanks for your support of behalf of developing children everywhere. ~~ Debbie