Pages

Thursday, February 28, 2013

Book & Craft: Strawberries

We love combine a good picture book with a simple craft - in fact that is how the Kids Crafts on Red Ted Art first started out. Since then we are much more focussed on the crafting. But every so often I do like to "go back" to our roots and share  a book and story.

This is actually a little craft we probably did about 2 years ago! Red Ted would have been around 3yrs old and Pip Squeak just a year or so.

We read "The Little Mouse, the Red Ripe Strawberry, and the Big Hungry Bear" - all about the little mouse trying to protect the big strawberry from the hungry bear (who actually never makes an appearance). You can read more about the book and a a little Toddler Bear Craft we made over on Red Ted Art! But you probably know the story already anyway. I digress.

Apart from the Toddler Bear Craft, we also made a little strawberry craft - super tactile and simple. And the kids just loved getting stuck in:
We read the story. Then I cut out some strawberry shapes and got out some pumpkin seeds left over from our Halloween Pumpkin Carving session.
Pip Squeak LOVED playing with the seeds, whilst her brother got sticking.
Our finished and drying strawberries.

They will now make great cards to send Granny and Grandpa through the post!

I think these make a great class room activity for toddlers and preschoolers!

Maggy Woodley writes at Red Ted Art, Life at The Zoo and Theatre Books and Movies! And has her first craft book coming out at the end of March. Check out her affiliate store for Red Ted Art, The Book.


Wednesday, February 27, 2013

Cultivating Emotional Intelligence

A friend who teaches science to kindergarteners through 5th graders in local public school, recently told me how she decided to dedicate time to teaching how to be a good friend.  She went on to explain how her students, mostly from low-income families, would react so harshly and how social interactions tended to escalate quickly.

Although taking time away from academics may be frowned upon by some, emotional intelligence is critical to later success in life.  Jane M. Healy, Ph.D., an educational psychologist, has written numerous, well-researched books on children, their brains, and learning.  In Your Child’s Growing Mind, she argues that emotional intelligence is “actually more important in life than school smarts.”


One way to cultivate emotional intelligence is to help children learn how to identify when they are starting to feel out of control or overwhelmed, and then access tools for calming themselves down.  In our school, and at home, we use “Take a Break” spaces.  Please note that these are not for the traditional “time out.”  Rather, these are places where children can go on their own accord, so as to regain some composure or calm.

At The Montessori School of the Berkshires our Take a Break spaces are inspired by The Shining Mountain Center for Peaceful Childhood and include items that appeal to different senses.  Some key components of the Take a Break spaces can include:
  • scent bottles with essential oils (for calming, energizing, or promoting balance)
  • pictures of peaceful scenes from nature
  • textured items (objects from nature, sensory balls, etc.)
  • items like a sand timer or electric tea candle (to indicate a “start” to using the space)
  • objects that provide auditory or visual interest (e.g. sea shells, thumb piano, kaleidoscope, etc.)


To keep the area fresh and engaging, we try to rotate the Take a Break items every few weeks.  We have a Take a Break space for each classroom (either in the classroom or in the hallway just outside the classroom door, depending upon various factors), and I have a space in my office for children who need an even greater distance from whatever is troubling them.


My daughters and I created a cushier version of the Take a Break space for home.  They picked out a neutral space in our upstairs hall where we could nestle in a bean bag, a PillowPet, a blanket, and a basket of some calm-down items.  The tissue box came later, once someone used the space while teary-eyed.


In addition to some books (both for reading and one for coloring), we added scenty pencils, a small bean bag, a sensory ball, as well as some easy-to-make items.


In a slender jar, we added glitter, water, and food coloring, which provides a lovely, calming effect when you shake it.


We also colored rice with food coloring and rubbing alcohol, added it to a ball jar, and hid little items inside.


Finally, we smooshed homemade playdough into balloons, which creates the perfect squish-when-upset item!


Our inspiration for the Take a Break spaces at home came from a Positive Parenting post on a Calm Down Corner and Calm Down Travel Bag.

While fun to make, the underlying purpose of all of the items and spaces is to help children become more emotionally literate.  I’m delighted when one of my children stomps off, shouting, “I need to take a break!”  In that moment she has recognized that she’s on the brink of doing something that she’ll likely regret once she’s calmed down.

Whether at home or school, we can create the spaces where our children can cultivate their emotional intelligence and form a foundation for future success.

Tuesday, February 26, 2013

Explore the colors of the rainbow with discovery bottles

By Laura Eldredge

With St. Patrick's Day and Spring right around the corner, many classrooms will focus on fun activities having to do with RAINBOWS!  Let's take an old favorite in the preschool classroom - Discovery Bottles - and do a little color learning and rainbow fun.


Instead of pre-making the discovery bottles for our class to use, a few weeks, we had the children to make discovery bottles for their classroom.   Engaging children in the process of making colorful collage discovery bottles is a good activity for learning colors and a great opportunity to practice sorting.

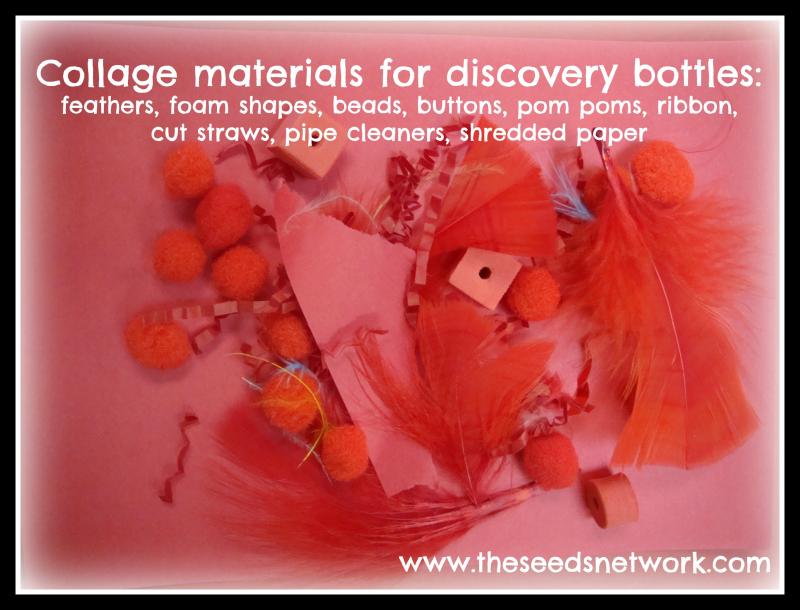
First, I collected enough clean (and emptied) water bottles for each child. Then I gathered a variety of small collage items - small enough to fit into the opening of a water bottle.

 
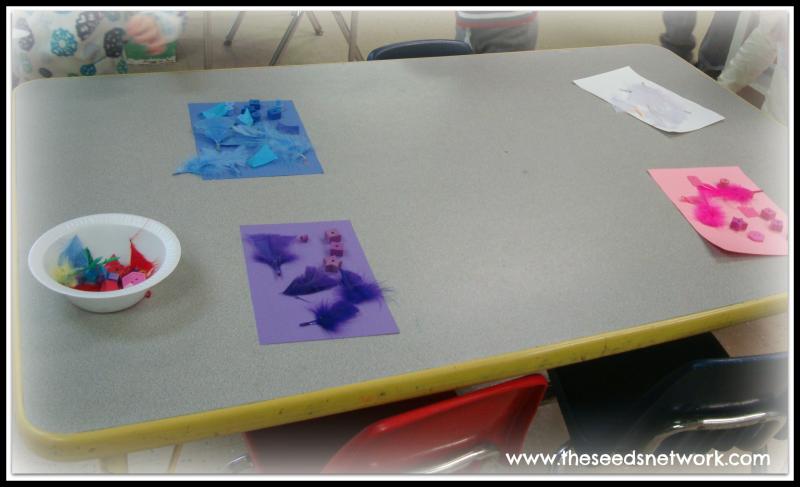
When we were ready to sort, I set out pieces of colored construction paper (representing the colors of the collage materials) onto tables.

 
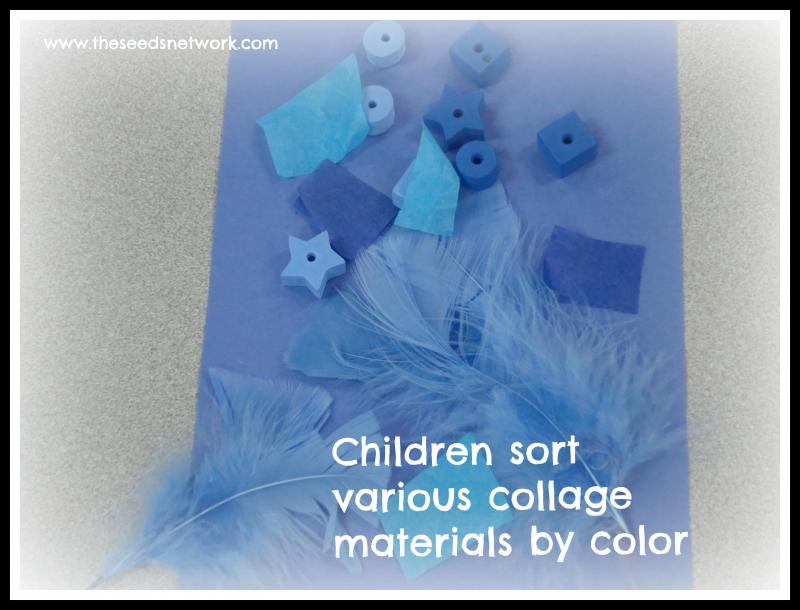
Each child had a small container filled with a selection of the collage items and they went around the room and matched each item to a colored paper. Using the colored construction paper was helpful for our young preschoolers to see if their color matches as they sorted.


After all items have been sorted, each child chose a color and filled a bottle with only items of that color. We talked about the different shades of the colors (i.e.. some items are light blue, some are a darker blue ... but ALL the items are blue).
 
Once filled, we put the caps on and placed them in our science area for future exploration. You can choose to hot glue the caps so the bottles can't be opened again - but you can also choose not to (since there is nothing liquid or messy in them), and allow children to try to empty and refill bottles.

RAINBOW BOTTLES WITH LIQUID


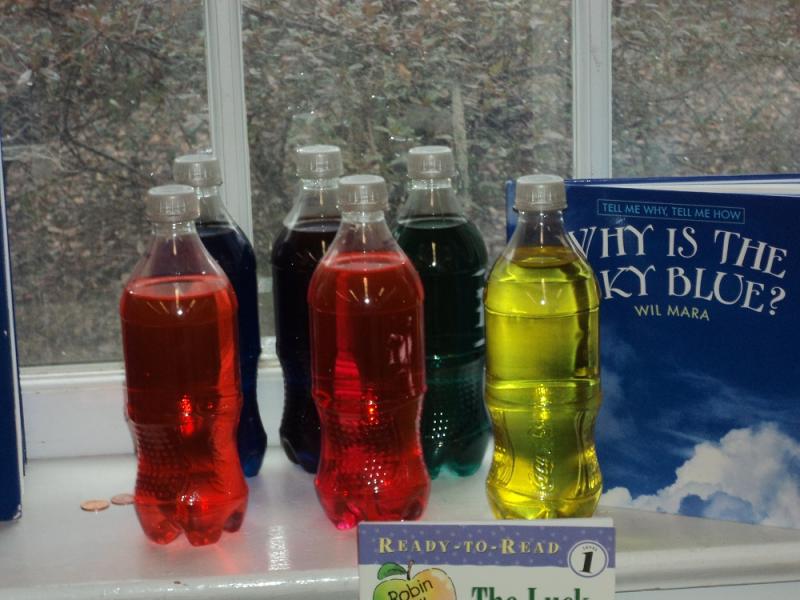
Another option is to make rainbow bottles is to use liquid (this will require more teacher/parent assistance).  First, fill the bottles almost all the way with water. Then add a few drops of food coloring into each bottle so that you have 1 bottle for each color in a rainbow.  As an option, you can also have a little less water and instead add some cooking oil before adding the food coloring (for a different look).


 Hot glue the lids onto the bottles, so they won't spill as the children play.   Put the bottles out for children to explore along with some books about colors.


Laura Eldredge is a teacher and curriculum coordinator at a NAEYC accredited early childhood program in Connecticut. She also co-founded the website
The SEEDS Network, as a way to provide early childhood professionals with ideas and resources that support them in their quest to provide quality care and education to our youngest learners. She blogs at www.theseedsblog.com.

Sunday, February 24, 2013

An Unforgettable Experience With Leprechauns: With a Little Luck Can It Align to the CCS?

I know the Common Core Standards are big time, but does it drive your entire curriculum?  If there are no ties to the CCS, do you forgo the lesson or activity? It frightens me a bit to think this is the direction our educational providers may be heading.  I got a comment on my blog in reference to my all-time favorite activity to do with my kindergarten students that stated that it "looks fun, but has no ties to the Common Core Standards" and it really saddened me.  I think, if we tried REALLY hard, we could quite possibly create some "ties to the CCS", but do we REALLY need to? Does everything we do in our classrooms REALLY need to be driven by the Common Core Standards?  If so, there needs to be a huge revamping taking place because there are huge gaps that won't allow for student experiences and creating memories if we stick to the basics.  I think you know where I stand on this, but I would love to hear your thoughts and ideas on this as well.  Am I alone?  Until then, I will leave you with the directions to my ABSOLUTE FAVORITE activity that I do year after year with students who NEVER forget during leprechaun season:  
 
I love St. Patrick's Day! I can't even tell you exactly what the entire premise of the holiday is (is that bad?), but I love the whole tricky leprechaun theme (and all things rainbow and gold, of course). I've done all of the fun activities that you hear everyone talking about like messing up the room, putting green food coloring in the toilet and making traps. But, I don't do those things anymore- I haven't done any of it since I came acrossed the shrinking hat activity and now THAT is how we celebrate the leprechauns in kindergarten! It is such a fun and memorable activity, that is truly all you need to have a little fun with your itty bitties (or children of any age for that matter). It is one of those activities that I am just so excited to share with my students, as well as my own children, year after year. It never seems to lose its magical appeal.

Of course, before we begin, I really talk up the "legend" (I totally make it up year after year--but it so makes the project all that more fun!). You, too, can make it up or I do have it available in my Lucky Leprechaun Activity Kit (with all of the materials you need for this project along with activities to follow up with the next day).

Here are the directions so you can celebrate the holiday and rev up your student's imagination without making a disaster of your classroom:
Materials:
*styrofoam hot/cold beverage cups
*permanent markers (I prefer to just give "Irish"-like colors- yellow, black, green and orange)


When you bring the tiny little hats back to school, I recommend putting gold coins and other "booty" in and around each child's hat. Leave a letter (written by you from Lucky or printed from my kit) for the children. Be sure to use an Irish dialect in the letter since it is from a wee leprechaun!
Lucky always leaves us a secret message hung all over the room that the children need to decode (also included in the kit) and it is so much fun. It is also fun to take pictures of the kiddos with their hats on and do a writing piece about the experience. The students NEVER forget this activity...it really is quite amazing how cups are turned into an actual miniature hat by those sneaky leprechauns (even though I know it is science, I prefer to continue to view it as magic as I watch cups turn into tiny hats !
Click here to get this follow up freebie for this project.


Click here for more information about the  Lucky the Leprechaun project!
 

Saturday, February 23, 2013

Build on Sticky Paper

Hi! It's Scott from Brick by Brick. I love to repurpose materials—use materials in ways different from their intended purpose.

One of my favorite repurposed items is our magnet board - really an oil drip pan from the discount store. We use it a lot for all kinds of magnet play. But we've also used it for other kinds of play. Most recently we added sticky paper (clear contact plastic, sticky side out).

copyright Brick by Brick

You could use just about anything to put on the sticky paper. I'd recommend foam, plastic, or wooden items so kids could put them on and take them off. We used foam cubes (purchased from the dollar shelves at Target a few months ago) and small wooden blocks (on sale at a toy store). You want something that is light enough to stay on the paper. 

copyright Brick by Brick

The kids experimented with designs and just putting things on the paper.

copyright Brick by Brick

We even had a car "stick around," too. A boy tried putting it on wheels-side to the paper, but it wouldn't stay. So he flipped it over to stick on.

copyright Brick by Brick

Kids came and went with this activity. At times the paper would be cleared and new designs would emerge. 

copyright Brick by Brick

I did have a boy try to stick blocks in areas above the paper, so kids need to know boundaries. I like to use colored masking tape so kids can easily see where the sticky paper is. Or you could use regular contact plastic that is white and not clear, so kids will know where to place the items. 

(You can see more sticky paper and blocks at Brick by Brick.)


Full disclosure: I copped this idea from Deborah at Teach Preschool. Her blog is great and I'd recommend it to anyone who has anything to do with young children. Read it!

Friday, February 22, 2013

FREQUENT DANCING OFFERS PROTECTION AGAINST DEMENTIA -- So put on those dancin' shoes!


Breaking news from the New England Journal of 

Medicine -- and another reason to put on those 

dancin' shoes!

Cincinnati Dance Happening August 2009


FREQUENT DANCING OFFERS PROTECTION AGAINST 

DEMENTIA


Reading:  35% reduced risk of dementia

Doing crossword puzzles at least four days a week:  

47% reduced risk of dementia

Dancing frequently:  76% reduced risk of dementia!!!


Here is more information on this exciting finding that 

was published in the New England Journal of Medicine. 

The following excerpt is from the most recent 

OhioDance Newsletter:


Dance Is the Best Means of Avoiding Dementia

Scientists have proven that regular dancing decreases 

the risk of dementia by 76%.


What should you do to keep a clear head in old age? 

The Albert Einstein College of Medicine in New York 

has taken 21 years in order to solve this puzzle. That’s 

how many years they have been studying how different 

kinds of activities influence sharpness of mind in the 

over 75’s.


No one was surprised to find that regular crossword 

solving lessens the risk of dementia by 47% and 

reading by 35%. But the truly unexpected result was 


that the activity that best preserves the brain from 

aging is dance. If you dance often, the risk of dementia 

decreases by 76%.


How can this be explained? Over the course of life, 

neurons continually die, but the young brain finds 

replacements for them more easily and chooses other 

paths for the performance of one or another function. 

With age, this process becomes more difficult. After 75, 

people do more on automatic pilot, out of habit. 

dance cannot be automated. Completely different 

situations arise, in which you have to react and make 

micro-decisions in a matter of seconds. The brain has 

to conduct impulses by various paths. It practices and 

maintains flexibility. Dr. Skinner of Queen’s University 

of Belfast got similar results in his goal-oriented study 

on the influence of dance on people over 70. According 

to his research, dancers preserve their health longer—

in social, mental and physical ways.


Incidentally, according to project heroes of The Age of 

Happiness, as well, dance is the most preferential type 

of physical activity, especially after 80 years of age.

You can read the scholarly report 
at:

http://www.nejm.org/doi/full/10.1056/NEJMoa0222

52


MOVING IS LEARNING!

Please visit Connie at: 

www.movingislearning


       and
Flash Mob Dance at Denison University April 2011


http://redleafpressblog.org


Keep on dancin',

Connie

Wednesday, February 20, 2013

Reading Aloud: Great Informational Texts


Reading Aloud Great Informational Texts

February is one of my favorite months. First, it’s short. Second, it adds a day every four years. Third, it is filled with diverse holidays – from Groundhog’s Day to Valentine’s Day to Presidents’ Day – within the context of thematic tributes like “Black History Month.”
For parents, February presents a treasure trove of ideas for engaging children with great reading materials.
One of the reasons children are drawn to books is to learn more about their world. Children run the gamut, as I have seen some students look with fascination at the pictures of different rocks for months on end in old, beat-up Time Life series books on rocks and minerals, while others check out atlases and carefully examine different places in the world. The more photos and illustrations, the better!
Children are naturally curious about the world they live in, and books are wonderful passports to educate children on new topics. As parents, we can feed children’s hunger for knowledge with daily read alouds of informational books. Here are some ways you can incorporate informational texts into your daily routines at home:


Share Interesting Newspaper Articles. I cannot remember a day that went by growing up (or even to this day, for that matter) when my parents did not read aloud some article that they found interesting in the newspaper. We’d be sitting in our living room, all doing our own things (for example, my dad would be reading a book in his chair, mom would be reading the paper, I was probably watching TV, my brother would be building a model and my sister was having a funeral for one of her dolls), when my mother would loudly read aloud a story about a meteorite that struck Russia or some three-headed frog scientists found in Colombia. While I often found the interruptions to be annoying, I realize that I do the same dang thing with my own children. I also now realize that while always acting disinterested, I often would check out the article on my own when my mother left the room!


Cook Together. My wife is saving my life by forcing me to eat healthier. We’ve been teaching our children how to cook various healthy meals, and we always point to recipes in our cookbooks. You can also teach children how to read the nutritional information on products.


Go Through the Mail Together. I don’t care if you are seven or seventy – isn’t the trip to the mailbox always exciting? You never know what awaits: a Valentine’s Day package from grandma and grandpa, a flyer for a new toy store, a bill from the electric company. My youngest daughter loves walking to the mailbox and sorting mail with me. She’ll point to various pieces of mail and ask what they are, and I’ll read aloud various items that attract her attention.


Text Together. Embrace technology, don’t fear it! If you don’t understand the latest concoction, you can always ask a five-year-old how to use it (believe me, they probably know how to use it better than you do). If you spend a ton of time on your iPhone texting and reading articles, why would you think that your children would not be interested, too? Show your children all of the information that they can have at their disposal in their pocket every day.
Read Aloud “Tough” Books. What do I mean by “tough” book? A tough book, to me, is a book that is written well above the level of the child. Preschoolers can check out the pictures in books, but most cannot decipher much text. It is one of our jobs as parents to read aloud difficult texts to our children. Remember that while children’s early reading abilities may be limited, most can comprehend things that are read aloud to them at much higher levels. If you don’t believe me, ask your little one to read a movie script and tell you what the movie was about. Most cannot do it, but they can certainly tell you all about a movie after they have watched it. That’s because our listening comprehension abilities far exceed our reading comprehension abilities at a young age. One of the reasons I am so interested in Presidents is because my father used to read aloud to me books and articles about various Presidents and Founding Fathers.
There are all sorts of ways to expose your children to interesting informational texts during the course of a typical day. Nothing I share with you is too difficult. However, in my experience, it is usually the simple things that have the greatest results. What are some basic habits you have exposing your 

Tuesday, February 19, 2013

Marigolds at the Marketplace


My artists created these beautiful flower pots overflowing with vibrant Marigolds commonly found at 
marketplaces in central America.


Class one 
Students drew a basic shape with oil pastels, then repeated it on their flower pot using monochromatic colors.
Popular shapes were circles, triangles and squares.


Class Two

After the flower pot was glued onto a 18 x 24 piece of construction paper, 
students painted stems and curly vines of plants using
various shades of green tempera paint.


Next, students created their flower head shapes on previously painted paper. 
Some students added petals and 
textural designs with oil pastels


while others used a circle to get their shape started. They then cut a fringe towards a smaller circle 
for a 3-dimentional effect.


 Class Three

We added coffee filters painted with liquid watercolors 
to create the centers of our flowers.


Last they added painted paper leaves to complete the flower.


Spring is right around the corner!
 We are decorating our school  just in time for 
Youth Art Month. Hope you have something planned for your favorite artist to celebrate the wonderful world of ART!


Laura is an elementary art teacher and the author of the blog Painted Paper. She has presented her thematic units nationally at the National Art Education Association and Ohio Art Education Association Conferences. You can follow her updates on fun and creative projects for kids here.