Pages

Monday, April 30, 2012

Re-using and Re-purposing!

At our place, Earth Day is Every DAY!

Our DIY Light Table was made of re-used materials.
The sides of wood were from a broken shelf,
The plexi-glass came from a discarded entertainment center,
and the lights were from old fish tanks.... 
As an early childhood professional, I fit well with in the diagnosis as I heard first coined by Teacher Tom as the "middle aged bag lady,"  or how I like to refer to it as the "curb-side collector." My affliction with this can easily be seen as you walk through our space...
Our tinkering place is filled with all sorts of things we can re-use.
If you remember, last month, I shared with you our outdoor space, which is a HUGE compilation of re-using, and re-purposing to make an outdoor classroom. If you missed that post, you can read it here.

Marker tubes and caps are great to re-purpose!
Don't you just love this house and rainbow ladder?
You can do so many things with Markers That Don't  Work!

Some of our biggest treasures come from our creativity and ability to use and reuse things that other people would consider trash! I have been told on more than one occasion, "Wow! You really can re-use anything!" And well, we try.....

Our home-made stamps re-use all kinds of materials too!
We used some extra craft foam to draw on, the reinforcement cardboard came from cereal boxes,
and the handle is a wine cork.

When we re-use and recycle items we:

  • Promote Creativity, Modeling to children that things may not always be as they seem and that you can use things in ways that they may not have been intended. 
  • Encourage Ecology- Every time we re-use and re-purpose, we keep materials out of the landfill or conserve energy that would have been used to recycle.
  • Encourage craftsmanship and discourage consumerism. We live in a "throw away" society. When we re-use and re-purpose, children can learn the value in making something last and something useful out of something else, and when we model this, they can come to the understanding that you don't have to  purchase/buy everything. 

Cutting Discarded Logs Into Cookies Make Great Blocks!
I found these soft maple logs on the side of the road, and we cut them into cookies.
We have oodles of other ways in which we re-use items, hop on over to the Child Central Station blog if you are looking for more!

Our totem poles in our rock garden are made from  coffee cans

What do you like to re-use and/or re-purpose? 

I'd love for you to link it on up!!!!

The linky rules are simple...
The post much include at least one way in which you re-use or re-purpose something

AND
Adding our button to your post would be greatly appreciated!
PreK + K Sharing
<div align="center"><a href="http://www.prekandksharing.blogspot.com/2012/04/re-using-and-re-purposing.html" title="PreK + K Sharing "><img src="http://i284.photobucket.com/albums/ll28/faithandfifty/FabricButton-2.jpg" alt="PreK + K Sharing " style="border:none;" /></a></div>


 More About Amy

Amy Ahola is the owner/operator of Child Central Station, group home daycare and educational toy store in Marquette, Michigan.  She has been running her own business since 2005. Prior to that time, Amy worked in a childcare center and public school. In addition to her childcare business, Amy also provides educational training sessions. Amy earned a Bachelors of Science in Psychology from Northern Michigan University and a M.S. in Training, Development, and Performance Improvement.  For more information about any of her programs, please visit Child Central Station or Find her on Facebook


Sunday, April 29, 2012

Teaching Children to Draw


Hello Pk+K Sharing blogging friends! My name is April Larremore but in the blogging world you may know me better as “Chalk Talk”.  I’m thrilled to have been asked to stop by as a guest blogger today.
 
Wanting to stay in line with the “artsy” feel of Hello Pk+K Sharing, I decided to share my thoughts on the importance of teaching young children how to draw. 

So... with crayons, markers, and paints in hand, keep reading as I share about ways to get your kids talking, drawing, and writing in the early childhood classroom.
 
Typically drawing is not honored or valued in the same way that the written word is. This was true in my own kindergarten classroom up until several years ago when I began to see the connection between the details students included in their drawings and the amount of detail they included in their writing. As I began to invest small pockets of instructional time teaching my students how to draw, it was exciting to see how children who were adding more detail to their drawings were also adding more details and information in their writing. Believing that for young children drawing is writing I realized the importance of providing my students with the information they needed to draw well, just as I was doing with my writing instruction.

In their book, Talking, Drawing, and Writing: Lessons for Our Youngest Writers, Martha Horn and Mary Ellen Giacobbe write “Because drawing is writing for young children, providing opportunities and guidance in drawing helps children to learn to use one’s eyes to see more intensely. And in that intense looking they have the opportunity to come to know something better and thus to represent it on paper the best that they can, at first through their drawings and over time through their words.”

Believing that this is true, I started to spend more time teaching my students how to draw while also pointing out the illustrations and details in our class read-alouds.

Here are the steps I took to teach my kids how to draw with detail:

At the beginning of the school year, I guided students step-by-step through all of their drawings. In order to learn to do something well you have to do it a lot, so we didn’t just draw faces, we drew lots of faces. We didn’t just draw ourselves, we drew ourselves often, and we didn’t just draw other people we practiced it daily.


I provided my students with lots of time and opportunities for drawing throughout the day and across the curriculum. We drew in response to read-alouds, for graphs and thinking maps, and when making class books.


I started by having children draw about what they know well-themselves. We drew self-portraits at least one time every day in the first couple of months of the school year. I directed students through their drawings one-step-at-time and I taught them how to use basic 2-D shapes to draw themselves. 
  
At first, I gave students small sheets of white or manila paper. Early on I did not want students to focus on the background, setting, or other characters so I made the paper smaller. Over time, I increased the size of the paper and moved my students into adding background elements to their pictures.

When drawing, I started with the child’s head and worked my way down always modeling for students what to draw and where to place that body part on their paper. For example, I drew my head then had the kids draw their head.
I taught my students to draw body parts based on basic shapes. For example: head (circle), shirt and pants (rectangles), neck (rectangle), shoes and hands (ovals), skirts (triangles), arms (rectangles), etc.


Once I saw students could draw themselves well and with lots of detail, we started to draw other people, animals, and buildings. We practiced drawing characters in a variety of ways such as from the side, from the back, and in action. We also practiced drawing people with different facial expressions and displaying different emotions.


As my students’ drawing skills grew, I moved away from the step-by-step model and begin to provide them with quick pencil sketches for them to look at. I no longer had students all draw the same picture at the same time. They decided what they wanted in their picture and if they were unsure how to draw it, they asked for a sketch. My sketches were black and white line drawings made from shapes that I quickly drew on pieces of scratch paper.  

Once we moved to drawing backgrounds in our pictures, I taught my students that they needed to be specific in the information they included in their picture- that good drawings and good writing are built on accurate pieces of information. For example: rainbows, hearts, and flowers do not belong in drawings about a trip to the zoo, a birthday party, or a family holiday celebration.


As my students drew, I assessed their drawings to see what they needed to help make their drawings better. Then I created mini-drawing lessons around these findings. I used read-alouds to teach students about the craft of drawing.
My students started the year drawing basic people like the one on the left and ended the year drawing detailed people, characters, settings, and animals like the picture on the right.


I got students talking about their drawings through whole group discussion, partner talking, and share time. This is an important piece of the drawing process. Talking and sharing honors who they are, helps children learn from each other, acknowledges that talking plays and important role in drawing and writing, and helps children to learn the element of the craft before actually putting it on paper.

Basically, I used lots of repetition, step-by-step examples, and a gradual release model for teaching drawing in my classroom. Try it out in your own classroom and I think you will be amazed at how well it works. If you have more questions about how I taught drawing or how drawing with details carries over to writing, feel free to email me at april.larremore@gpisd.org.


Happy Drawing!

Saturday, April 28, 2012

Twisted Paper Sculptures

Today I am sharing a Paper Sculpture Project using just a few materials: Construction paper, scissors, glue, and paper clips (or tape). Enjoy!


First,  pick two sheets of construction paper that are different colors.


Then,  put glue on one of the pieces of construction paper.


Glue the two pieces of construction paper together like this.  With younger kids you may want to glue for them.


Now cut into you your paper with all different lines:  curvy, straight, wavy, zig-zag..... Do not cut any pieces off.  You could use those fancy scissors that cut different designs too.


Next gather your glue (tape), and paper clips.


Start twisting your papers every which way and use glue to stick and paper clips to hold the bend in shape.  For younger children that may have difficulty using paper clips (like my 5 year old),  you may want them to just use tape to hold their sculptures together.  Kids love tape.


Here is one of our sculptures drying with paper clips so it won't come apart.


Here are our finished Twisted Paper Sculptures.  You can see how cool the variety of color adds to the look of the sculptures.


If you like this idea....you'll Love our Construction Paper Strip Sculptures too.  Find out how to make them here.  


What have you been making with construction paper?


Melissa Jordan blogs over at The Chocolate Muffin Tree.  She is a former Elementary Art Teacher who loves inspiring other s with ideas on her blog.  Many of these activities she does with her 5 year old daughter.

Friday, April 27, 2012

The Bilingual Teacher


Hello. My name is Lidia Barbosa. I am the author of Kinder Latino and Kid's Reading Activities.  It is an honor to be invited to collaborate with Pre-K and K Sharing.

My first language was Spanish. I was born and raised here, in the United States.  Being a bilingual education teacher has been a very rewarding experience. I have taught 2nd grade, Pre-K and Kindergarten.  The Pre-K students are full of curiosity and willingness to learn new things, especially when you make it fun. Kindergarten students never cease to amaze me at how much they can learn. I love to see their reading and writing skills grow by leaps and bounds throughout the year.  What I love about second grade students is their self-motivation and that spark in their eyes that they get when they figure something out on their own.

I love the passion and respect for education that Hispanic families demonstrate.  Parents and students, alike, take education very seriously.  Parental involvement is especially high in the lower grades. These parents volunteer in the classrooms, teacher workroom, field trips, attend every conference and are always willing to help in some way. Even little holiday parties turn into huge celebrations with them bringing in more food than we can handle.

There are so many districts that provide some type of bilingual education. I am still surprised to see the lack of resources in Spanish for our bilingual classrooms. This becomes a challenge for us. We struggle to find books, center activities and reading resources for our students. Even-though there is a great need for it, the wide variety of resources are simply not available. Bilingual teachers spend many hours translating and creating material that is appropriate for their classrooms. This is the reason that I created Kinder Latino. It allows me to share ideas and activities with bilingual teachers.  My mission is to help others save a little more time and give students useful and meaningful resources in their own Spanish language.

After fifteen years of working in education, I was blessed with my third child. That was when my husband and I decided that I should stay home with my two youngest children. Time goes by so fast. I have three children. Daisy is 11 years old, Angel is 5 and Isabella is already 2 years old. I love spending quality time with them and enjoy them while they are still young. Now that I stay home, I have a little more time than when I was working.  I am able to create the resources that I always needed and wished for when I was in the classroom.  

I always new that I might want to publish some type of resources for bilingual education some day.  But, I never really imagined that my "stay-at-home-mom" status would turn into a "work-from-home" opportunity. Sharing ideas on my blog is a bonus.  It's a great feeling of accomplishment to be doing something that I love while helping others along the way. 

I have started to create some resources in English as well. Our bilingual students are definitely expected to learn English as soon as possible. Our goal is to provide as many opportunities for students to increase their vocabulary skills, comprehension and fluency in this second language.  With this in mind, districts offer various programs that they feel might be the best at achieving this goal.  Some bilingual classrooms provide an E.S.L. block during the day. This is when students build a foundation of academic skills in their native language.  They also focus on acquiring skills in English during a set amount of time each day. Other districts prefer the dual language method. This is when students are taught both, Spanish and English, during the day. Some prefer to use a rotation method where some days are taught in Spanish and other days are taught in English.  There are still other districts that prefer the full immersion program. It seems that no matter which program is being used, it still varies a little bit from campus to campus within a single district.  That being said, acquiring the English language is an important goal of the bilingual education program. There are simply different methods of teaching programs in the attempt to reach that goal.

I hope that you are able to find my future contributions to this community of Pre-K + K Sharing useful.  My next post will be in about two months from now.  I look forward to sharing more with you.  In the meantime, feel free to follow my Kinder Latino and Kid's Reading Activities blogs. Kinder Latino is for those who are interested in teaching Spanish to their little ones at school or in the home.  Kid's Reading Activities is an English blog that has some fun ideas for teaching young learners.  I hope to see you there :)

Enjoy these Spanish vowel prints for now.


Thursday, April 26, 2012

Taking care of the earth ... today and everyday!

By Laura Eldredge

We are still celebrating Earth Day in our preschool classes this week, are you?  We look for opportunities to use recycled materials all throughout the school year in our classrooms (saves on expenses).  But it also provides an opportunity to show the children how items can be reused, and how by doing that, we can do our part to be "Earth savers"!

I recently participated in an "Earth Day Blog Hop" with a group of early childhood bloggers.  We paired each of our Earth Day activities with a book, which provided an opportunity to extend the learning objectives.  Since we can pick any time of the year to teach our children about recycling and taking care of the planet ... here are a few ideas using recycled materials, along with a few book titles that can be used at other times throughout the year.

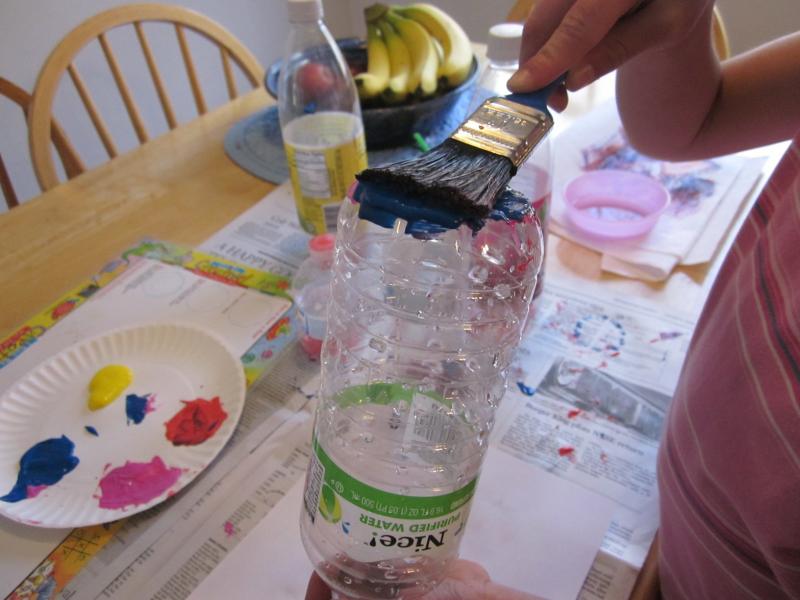
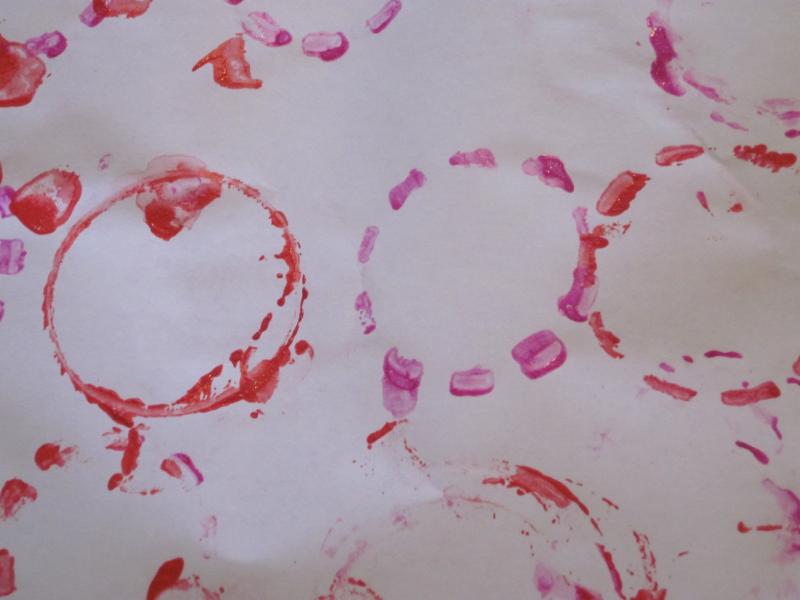
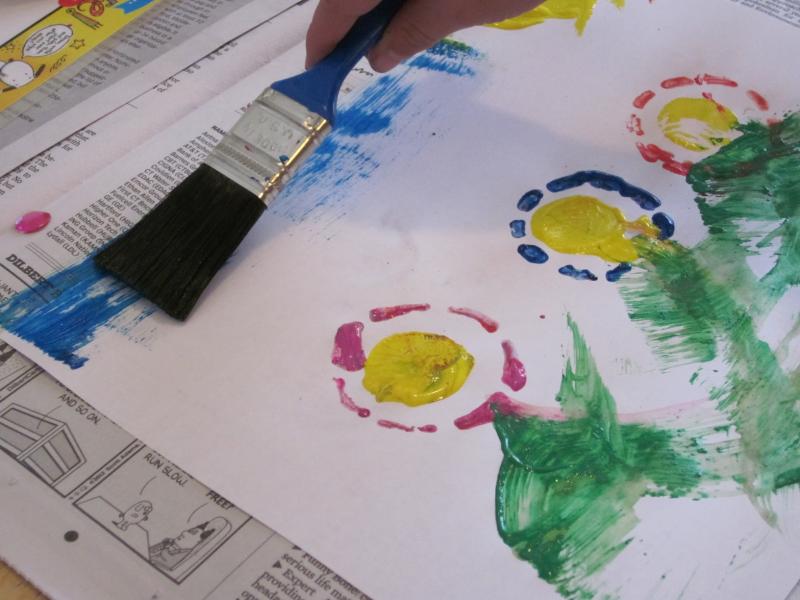
Plastic bottle stamping (Spring)

Have children make art by reusing plastic water bottles.  First, collect a variety of empty water bottles - look for the ones that have indentations on the bottom of them. If you are able, collect a variety of bottles in a few sizes, to make a variety of prints.

Next, cover tables with newspaper (another recycled item!), and have small containers of paint and with paint brushes. Then, have children paint the bottom of their plastic bottles and then press onto their paper to make prints, designs or painted scene.


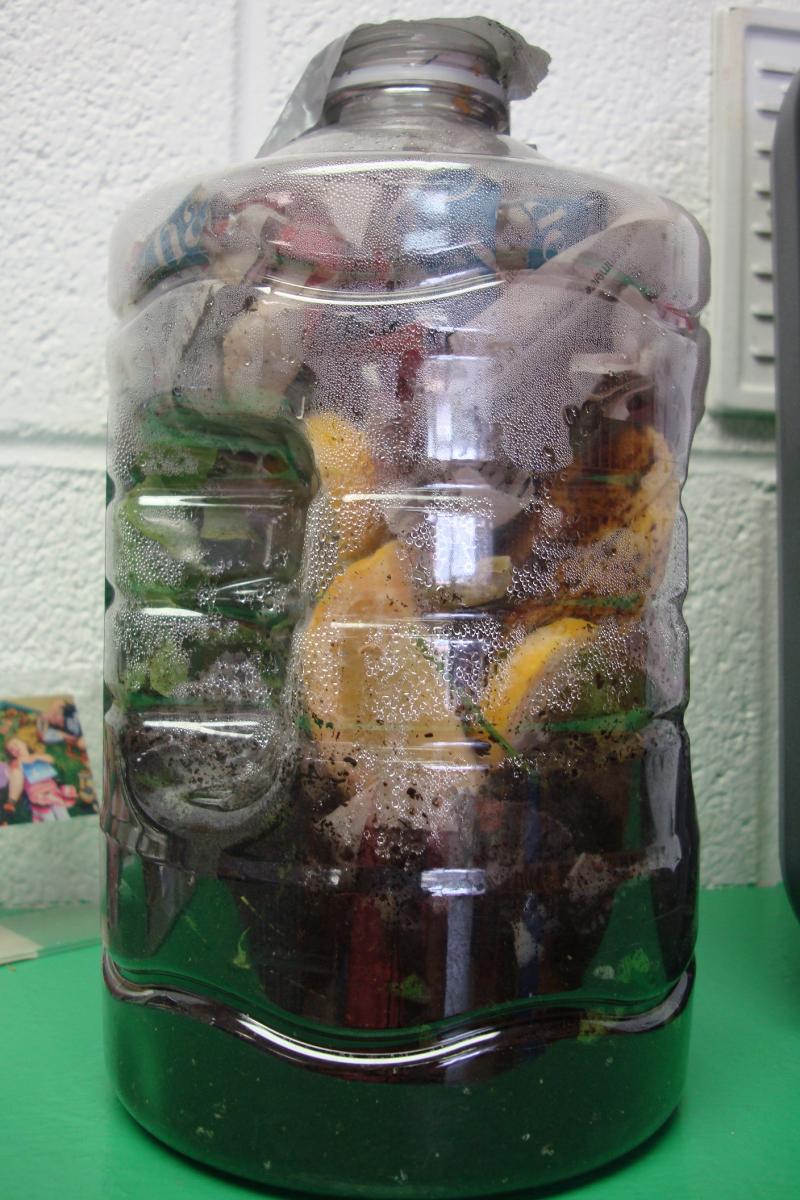
Compost in a bottle (Summer)

To teach young children about reducing and reusing food waste, and how food scraps can be turned into something useful for the environment - try making compost in a bottle.  Children can learn some great vocabulary words like compost, conservation, decompose.


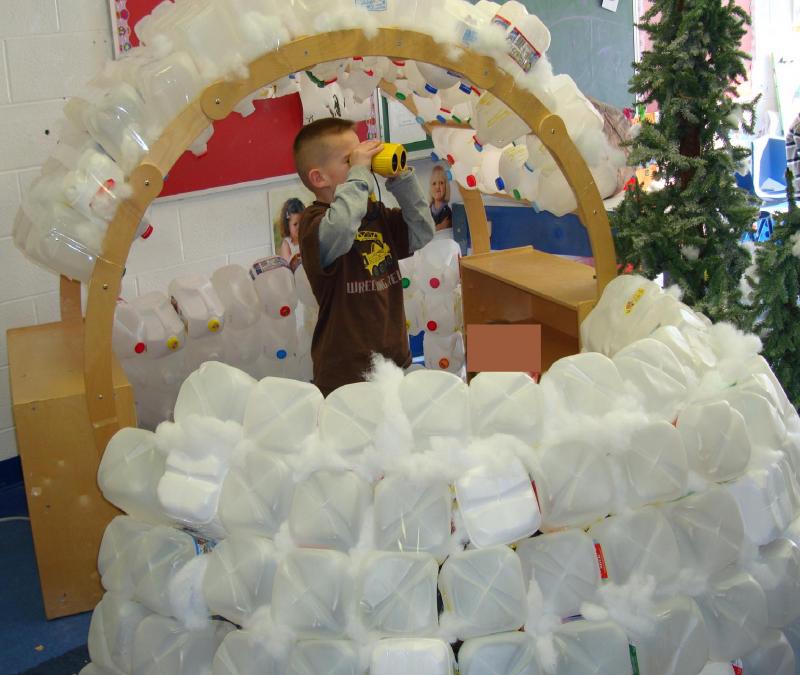
Milk Jug Igloo (Winter)

See how lots (and LOTS) of empty milk jugs can be hot glued together to make a giant IGLOO! 


Books


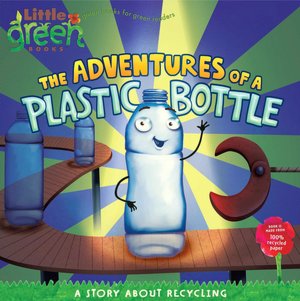
The Adventures of a Plastic Bottle
Follows how plastic bottles are made, how they get recycled, and some of the things they can be recycled into. 


The Earth Book
Illustrates ten simple ways the children can help take care of the earth!


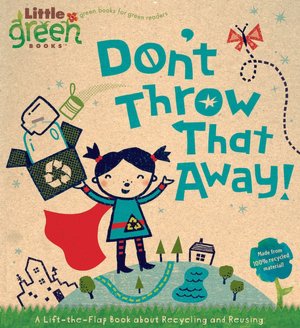
Don't Throw that Away
Follows an eco-conscious super hero as he teaches kids how to recycle and reuse common household items.


More on Earth Day? Here are a couple of other posts about taking care of our Earth and recycling ideas from our preK + K sharing blog:

Also check out:


Laura Eldredge is a teacher and curriculum coordinator at a NAEYC accredited early childhood program in Connecticut. She also co-founded the website
The SEEDS Network, as a way to provide early childhood professionals with ideas and resources that support them in their quest to provide quality care and education to our youngest learners. She blogs at www.theseedsblog.com.

Wednesday, April 25, 2012

GIFTS: Giving of Ourselves

Dearest  Family of Friends Who Love Our Children,

          We ARE a culture of THINGS and material goods and gift cards and catalogues of STUFF = shiny, new, electronic, colorful, hi tech, sweet smelling, fuzzy-wuzzy, but, sometimes it is valuable to STOP and rethink the idea of GIFTS
          Walking through the halls at our Leo Yassenoff Jewish Center's Early Childhood Program, I noticed, among the drawings and projects brightening
all the walls, the saying from the Wisdom of the Fathers  (Pirkei Avot- old sayings and guidance):
          "Greet everybody with a warm, cheerful and pleasant countenance."
         It stopped me in my tracks and started heart pumping rhythms. I hummed the old church hymn, "Tis a gift to be simple..." and told myself I would write you a letter reminding us all of the importance of the most
simple, obvious, natural 'gifts' we can share with each other. 


          Before my usual twirly thoughts were semi organized, I remembered
 a beautiful encounter I had years ago with the famed African musician drummer, Montego Joe, who, with his group performed a powerful concert at the Museum of Natural History in my old home town, New York City. 

     The group began the program with a lively chant and seemingly 'connecting' dance. Montego then said, "Before we begin our program, we wanted to welcome you with our special welcome ceremony, wishing everyone a happy day and hoping that our day together will be joyful. We are so blessed to be together on this day."
        After the program, I asked Montego Joe if he always started his concerts with the welcoming dance.
        "Of course," he answered, "I would never begin any sharing without a welcome ceremony."


         I think these are the greatest gifts we can give each other and our children. A cheerful, warm and pleasant countenance to begin and sustain our time together. Welcoming our youngest  students, their caregivers, our colleagues each day with a bright and loving welcome --can make the difference for the rest of the day between life and death. Glad to be together, to share this sacred time with you, to enjoy, learn, have fun with you- what 
better 'gifts' could we offer?  Walk, talk, build, play, read, sing together- kindness to all and each- a learning environment of respect, trust, safety and joy where every child feels valued and honored. 


     These are the programs children "run to" (I have an article in one of my collections called "Schools Kids Run To")  --  Every single one of those schools begins and sustains the day with the special beginning of a loving welcome and celebrates the joyfulness of learning together in the time that follows. It's not a strategy. It's not a formula or a curriculum system. It's the WAY it is when you and your students and colleagues are together. It's the air you breath , the words you speak and every gesture, expression and action. It's teaching in the 'key of life'.   I wish I could be a young child again and be a student in YOUR class! 
That would be the GREATEST gift!

  Love and Peace, Mimi Brodsky Chenfeld
        (books: Teaching In Thje 'Key of Life'
                       Teaching By Heart
                        Celebrating Young Children and Their Teachers

                        Creative Experiences For Young Children  )

Tuesday, April 24, 2012

The Differentiating Power of The Clipboard and Freebies

Hello Pk+K Sharing Friends! My name is Marsha McGuire.  I'm from a  blog called A Differentiated Kindergarten (come visit me sometime) and I am delighted to have been asked to sit in as a guest blogger today on this very fine blog.  While my own blog is "A Differentiated Kindergarten,", I would NEVER claim to be an expert on the subject.  I am, however, an active student of it. I feel it is important for me to keep working towards the goal of a differentiated classroom, and I carry the philosophy that every child in my class should experience success. 

For many teachers, differentiated instruction can be overwhelming.  There are so many aspects, strategies and tools to consider. 
The seeming enormity of it all, paralyzes them and they end up doing . . .well . . . nothing.  I am here to tell you,  differentiated instruction can be time consuming, it does take organization and routine and hard work . . . but you can get there by starting out slowly.  Pick one thing, just one, and start! 

Want to start by learning how to tier a lesson to address your students' readiness?  Great!  I just did a guest blog that will take you step by step through the process over at Mrs. Miner's Monkeys.  Just click the picture below and it will take you there and give you a freebie to boot.


Want to start smaller . . . that's fine too. The wonderful thing about differentiated instruction is that it addresses all kinds of student needs, not JUST readiness.

It allows you to consider student interests as well.  That's a biggy!  Interest is the HOOK!  If you want to find out how I 'hooked' my very first class of kindergarten boys into loving practice nonsense word fluency practice, click the picture below to find out . . . there's a freebie there too. 


But today I don't want to talk about addressing interest either.  Today lets just start by addressing  your students' needs in regard to their learning profile, your learning environment and the use on of one simple tool ---a clipboard!


By learning profile, of course, I mean the way in which students learn best. 


In addition to learning styles, learning profile also refers to a student's intelligences.  As we all know, Gardner believes that there isn't just one singular notion of intelligence, but in fact, there are as many as eight.  They represent not only how we acquire knowledge and information, but also how we represent what we know.

Just as a refresher take a look below:


Now if you're still with me I know what you're thinking . . .how does a clipboard have anything to do with multiple intelligences.  Hang on! I'm getting there . . .


A clipboard  . . . fancy, plain, plastic or particle board . . . can allow you to make adjustments to your classroom environment and offer activities that will address nearly every single one of these intelligences. And besides . . .  have you even seen a 5 year old with a clipboard?  They stand a little taller, they walk with a purpose . . . they feel IMPORTANT. There isn't a kindergartner alive that doesn't LOVE a clipboard. It is, sadly, an underrated learning tool.


And for your kinesthetic learner, it's like giving a 16 year old a license to drive. Suddenly they have permission to do what they do best . . . move!!!!!!!   To address my kinesthetic learners, I use clipboards for write the room activities in my classroom.


Here's a simple spring themed one you can pick up for free to use with your own little people. And because of the type of activity it is, it also addresses your linguistic students who like to read and spell and your intrapersonal intelligences who are content to work alone. 


Is a listening center part of your classroom?   With a small personal cd player and a clipboard, your listening center is now mobile.  Your student can choose whichever area of the room they feel most comfortable to work.  Here's great news! Listening centers are NOT only for taped stories with an accompanying book either.  Provide some great music or poetry for them to listen to instead. (I use nursery rhymes, kids favorite artists and even some ethnic music - Celtic is a class favorite) Grab up a copy of my music response sheet to use when addressing your students with musical intelligences.


Beginning of the year music/nursery rhyme response sheet.
 

End of year response sheet.


In some cases, a clipboard can give your interpersonal students an outlet for their social tendencies.  How about a math survey, where they interview their classmates and then analyze their findings. Here's one I'll be using for my dinosaur unit in the next couple weeks.  Click on it and it's yours. And because of the type of activity it is, it will also appeal to your logical/mathematical students.  If you want it, click on it and it's yours.


To address the naturalist among your students (by far one of the hardest one for me to do personally) why not take your work outside.  We do NOT have many beautiful days here in Northern Michigan in April, but I guarantee you, we take advantage of the ones we do have . . .


This fall my student teacher, Jennifer, had my kiddos outside using their senses to learn about trees and one of the assignments she gave them was to take the clipboards out and sketch a picture of the big tree on our playground. While they ALL loved it and needed to be exposed to it, my students with spatial and naturalist intelligences THRIVED.  

Differentiating CAN be time-consuming and over-whelming at first, but it can also be as simple as using a clipboard. Avoid doing NOTHING and start small . . . but please JUST START!!!

If you'd like to learn more about how I differentiate in my own classroom, please stop by my blog


Make sure you leave me a note so I knew you stopped by to look around.


****Note from the editor. We experienced some technological challenges with Marsha's brilliant post as it was first submitted. It had to be 're-published' and in the process the original 'pin' link was disrupted as well as the original comments that were posted were lost. 


We sincerely apologize for any inconvenience this may have caused. If you can possibly edit your own personal pins to this corrected URL we will all be very grateful. 


--Debbie Clement --